The retention date is the date until which content must be retained in the ImageRight system. After this date, the content becomes eligible to be permanently purged from the system.
You can use the Set Retention Date command to set the retention date on the file, folder, or document level. You might use this command if your organization does not configure retention rules in ImageRight Enterprise Management Console, but wants to apply retention policies manually. Before you continue, you may want to review Retention Management to learn more about the application of retention policies.
We are going to explain how to set the retention date at the document level. You can easily adapt our steps to set the date for the file or folder level. Along the way, we will explain how to view the retention date associated with a document. We will end by explaining how to remove a retention date.
- Open the file (or create a new file) for which you would like to set the retention date.
- Select
the appropriate level in the file (document in our example). The retention
date will be set for the selected document only. If you select the:
- File level, the retention date will be propagated to all documents in the file.
- Folder level, the retention date will be propagated to all documents in the folder (including documents in nested folders).
- Document level, the retention date will be set for the selected document only.
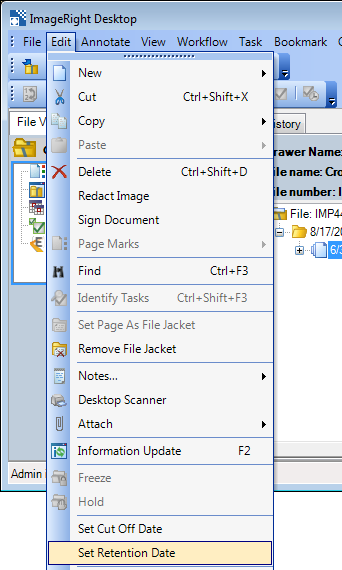
- On the Edit menu, click Set Retention Date. Alternatively, you may right-click the appropriate level, and then click Set Retention Date on the menu.

- Enter
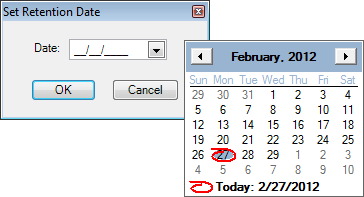
the retention date in the Set Retention Date dialog box. You can only
enter the current date or a date in the future.
- You may click the arrow in the dialog box, and then pick the date from a calendar.
- Click the arrows at the top of the calendar to move through the months.
- Click the desired day to set the date.
- Click OK to save the retention date.

- Click Yes when the warning message appears to confirm the date, or click No to cancel the action.

When the retention date is reached, the content will appear on the Document Retention Approval list, ready for approval to be purged.
You can easily view the retention date assigned to a document.
- Open the file that has a retention date assigned.
- Select the document for which you would like to view the retention date.
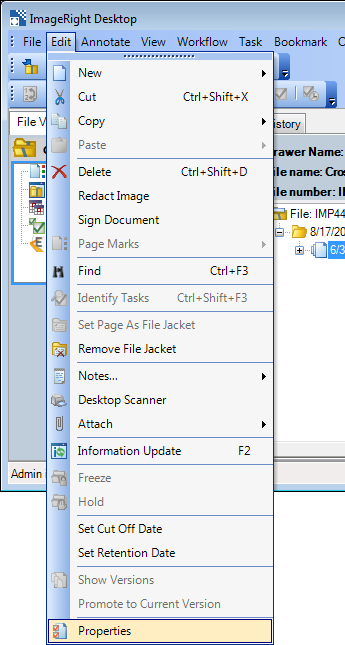
- On the Edit menu, click Properties. As an alternative, you may right-click the document, and then click Properties on the menu.

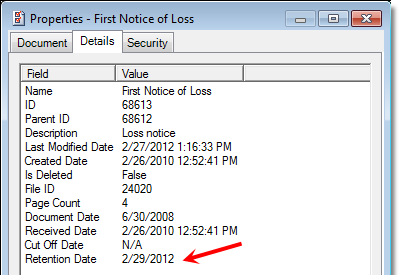
- Click the Details tab in the Properties dialog box to see the retention date.

At some point, you may want to remove or change a previously assigned retention date. You should consider any changes you make carefully as overriding an existing date may affect the application of the retention policy, that is, the date the content is purged from the system.
- Open the file and select the file, folder, or document for which you want to remove the date.
- On the Edit menu, click Set Retention Date.

- In the
Set Retention Date dialog box, change the date to the new date or remove
the date that appears. If
you change or remove the date at the:
- Document level, the date will be changed or removed for the selected document only.
- File level, the date will be changed or removed from all documents in the file.
- Folder level, the date will be changed or removed from all documents in the folder (including nested folders).
- Click OK to save your changes.

- Click Yes when the warning message appears to confirm the change, or click No to cancel the action.
