When the document retention period has elapsed, there are two options for purging the content from the system. The content can be:
- Retained for a manual review and approval process, which is explained here, when the retention date is reached.
- Purged automatically with no review or manual input needed. The automatic purge process is configured in ImageRight Enterprise Management Console (EMC). For more information, see the EMC Help.
The manual approval process is typically executed by a compliance officer using the document retention approval list. After the documents on the list are approved, the ImageRight Retention Engine, which is configured in EMC, executes the process of purging the content, that is, permanently removes the content from the system.
In certain instances, content will not be purged regardless of the defined retention rules and/or schedule. The following list of instances is not all inclusive:
- Content with an active task
- Task history
- Images
on
- write-once media (CD-ROM for example)
- a CAS (Centera) Backed Device
- ImageRight 3.x storage devices
- Images that are linked to content not eligible for purging
Content at satellite sites left over from a file ownership transfer request
When you are using the document retention approval list as explained later, it is important to understand that content may not appear in the list under certain circumstances.
Retention rules are global, that is, they are related to the master and all satellite sites (if you have optional satellite sites). The document retention approval list displays only that content belonging to each site. When file ownership is transferred from site A to site B, and the retention date has been reached, the content will no longer appear in the list for site A. The content will appear in the list generated for site B. That is, the content will appear in the list related to current file ownership.
Before you continue, you may want to review Retention Management to learn more about the application of retention policies.
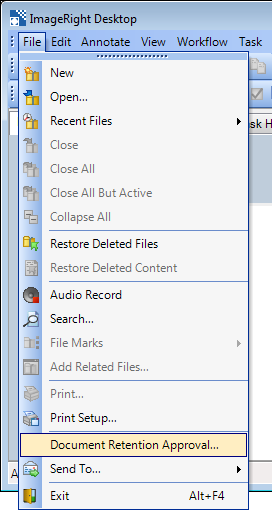
- On the File menu, click Document Retention Approval.
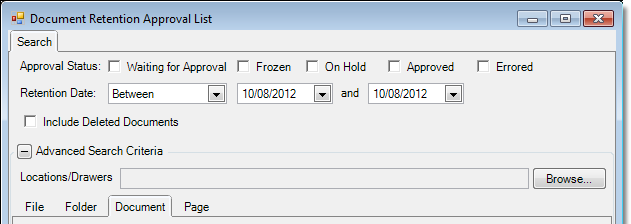
- In the Document Retention Approval List dialog box (often referred to as the purge approval list), select the options on the Search tab to be used as criteria for locating the content to be approved for purging.
- Select the Approval status based on the
definitions that follow:
- Waiting for approval – documents that are awaiting purge approval.
- Frozen – documents that have a freeze applied.
- On hold – documents that have a hold applied.
- Approved – documents that have been manually or automatically approved for purging but not yet purged by the Retention Engine.
- Errored – documents that are in error status and cannot be purged. Documents in error status cannot be purged until the error is resolved. Information regarding documents in error status can be found in the log file typically at C:\Program Files (x86)\ImageRight\Services\Logs\RetentionLog.txt.
- Enter
the date search criteria in the Retention date boxes. You can click the
arrows next to the boxes to select the date comparison method below and
select the dates from a calendar. When searching based
on dates, you must always search for a date before the current date.
- Before – the retention dates are before a specified date.
- After – the retention dates are after a specified date.
- Between – the retention dates are between two dates. The dates you enter are inclusive.
- Select the Include Deleted Documents option to include documents that have been deleted in the search results.
- In the Advanced search criteria pane, you can enter criteria, for example document types, document descriptions, attributes, etc., to further narrow your search. We suggest that you enter all known criteria to improve system response time.
- Click
the buttons below the list to execute a search, etc.
- Find Now – find the documents that match your criteria.
- Print Results – print the list of documents.
- Clear Search – remove your search criteria and start over.
- Open – open the file related to the document selected in the list.
- Close – close the dialog box.
|
The entry of the advanced search criteria and printing are accomplished in the same manner as if you were using the Search command on the File menu. Therefore, to eliminate redundancy, we are not going to explain the steps here. If you need more information about printing and entering advanced search criteria, see Search on the File View Tab |
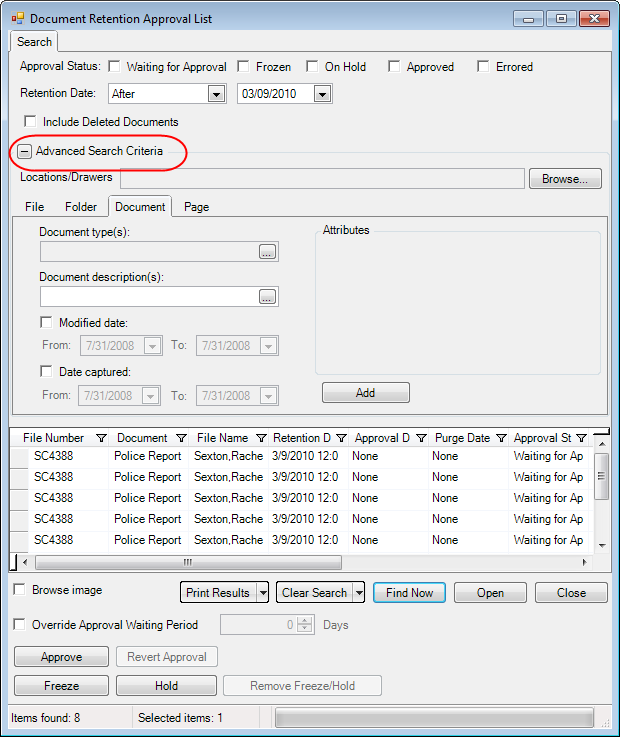
The column headings in the list are for the most part self-explanatory; therefore, we are not going to define all of them in detail. There are several columns that you will likely refer to often.
- Retention Date – The date until which content must be retained in the system. After this date, the content becomes eligible to be permanently purged from the system.
- Approval Date – The date content is approved to be purged as explained later.
- Purge Date – The date the content will be purged from the system. This date is typically the same as the retention date but can be changed by adding time for an additional waiting period as explained later.
- Approval Status – The status is approved (for purging) or waiting for approval, freeze, or hold.
|
The local time at the time of approval will be displayed in the Approval Date column. If you retrieve the list later, the UTC (Coordinated Universal Time) will be displayed. |
With the list of results displayed, you are ready to begin the approval process and apply other actions to items in the list.
- Select the Browse image option, and the image related to an item selected in the list will be displayed in the Image Viewer.
- Select the Override approval waiting period option and enter the number of days if you want to delay purging of the document for a specific time beyond the approval date.
- To apply
actions to an item in the list, select the item and click the buttons
defined below. You can select multiple items using Shift+click or Ctrl+click.
- Approve – approves the item to be purged. If a task is associated with the selected item, you will not be able to approve the purge process.
- Revert Approval – removes an earlier approval to prevent the item being purged.
- Freeze – applies a freeze to all the documents in the file.
- Hold – applies a hold to all the documents in the file.
- Remove Freeze/Hold – removes the freeze or hold.
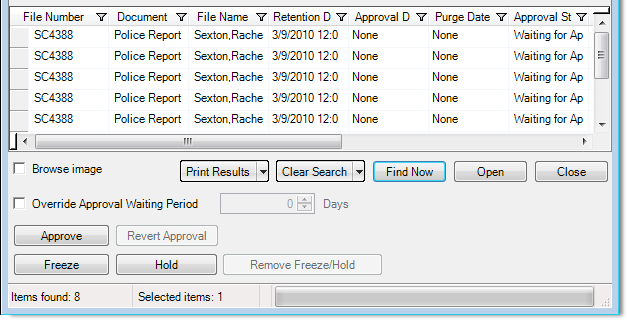
When you approve, freeze, or hold a document the highlight color will change, making it easy to determine the status of the content.
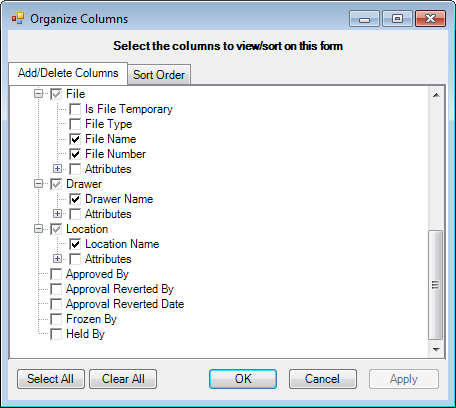
To make it easier to see items in the results list, you can customize the layout of the columns (add, remove, change the order, filter the results, etc.) to meet your needs as explained in Change the Column Layouts.
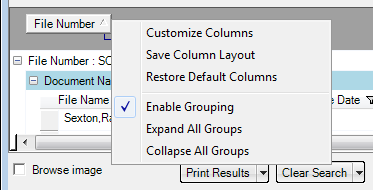
In brief fashion, to customize the columns, right-click a column heading and then click Customize Columns. A partial list of the columns that may be added is shown.
You may group the list based on the column headings as explained next.
- Right-click
a column heading, and then click Enable Grouping. Grouping is turned on
when you see the grouping area above the list and
 next to the Enable Grouping command. To turn off grouping, simply repeat
this step.
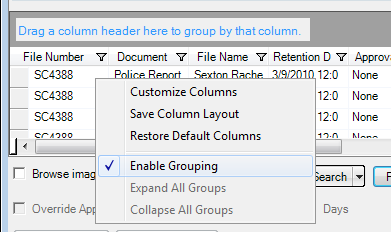
- Drag the column headings to the gray area just above the columns. The list will be grouped in the order the headings are arranged.
- Once the
grouping is complete, you may click
 or
or  to expand or collapse the list as needed. You may
also:
to expand or collapse the list as needed. You may
also:- Click the heading used for grouping to sort the list.
- Change the order of the grouping by dragging the column headings to the desired position. The red arrows help you identify the new position.
- Remove all headings to restore the list.

- You
can right-click a grouped list, and then click:
- Expand All Groups to expand the list to show all documents in each group.
- Collapse All Groups to collapse the list of documents and see only the groups.
