In this topic, we continue our description of the features of the Phone Book located on the Tables Menu.
You can designate people within a company (carrier, retail agent and broker, for example) a contact on the Contact tab. You can add new contact information or change existing information for companies.
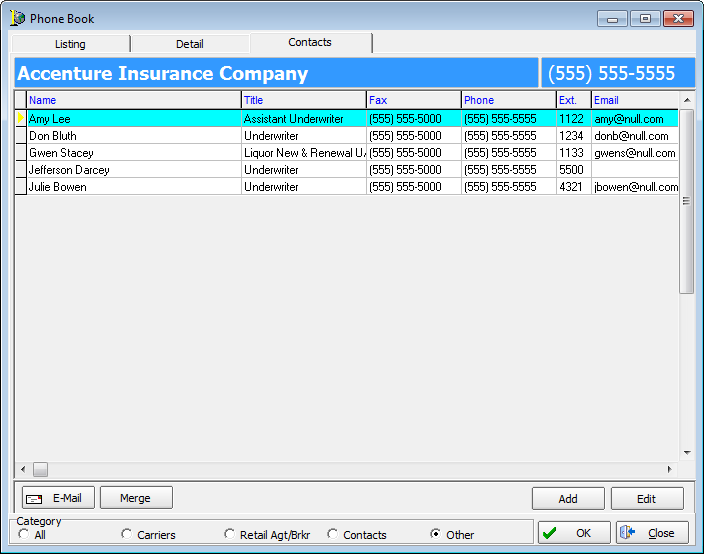
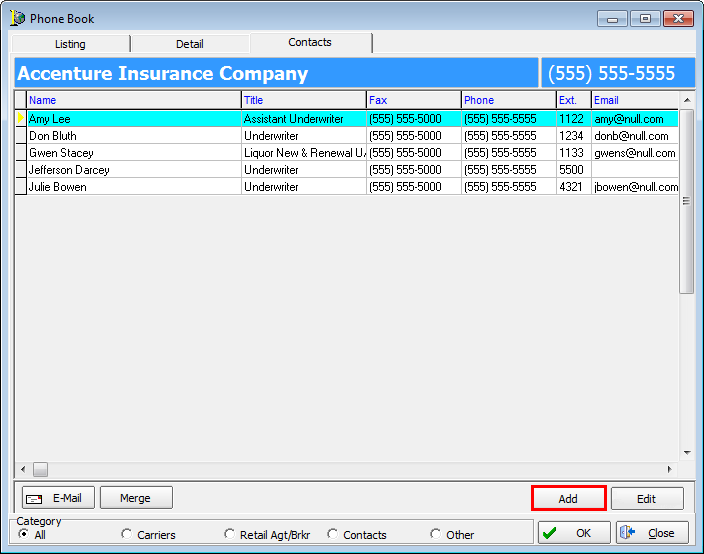
To see the contacts for a company, select the company on the Listing tab. Contacts are displayed using the familiar grid display. You can view each of the contacts or use the buttons defined in the following table to send an e-mail message to a contact, add new contacts, and edit existing contacts.
If you selected a contact that is an individual on the Listing tab, no information will be displayed on the Contacts tab.
|
Button |
Function |
|---|---|
|
|
Use the default e-mail program to send an e-mail to the selected contact |
|
|
Replace contact information on submission and policy records with information from another contact within the same company |
|
|
Add a new contact |
|
|
Edit the selected contact |
Since the e-mail capability is self explanatory, no further explanation will be provided in this guide. We will show you how to merge contacts and add new contacts. Since adding and editing contacts is a very similar process, you can use the information presented when adding a contact to edit contacts later.

|
Contacts can only be added or edited. For record keeping purposes, contacts may be made inactive but not deleted. |
Merge Contacts
Merging contacts replaces the selected contact's information on any submission and policy records with information from another contact within the same company. For example, if a person leaves a company or changes job responsibilities, submission and policy records in your AIM system can be updated to reflect the contact information of the person that is taking over those responsibilities. In the steps that follow, we will show you how to merge contacts.
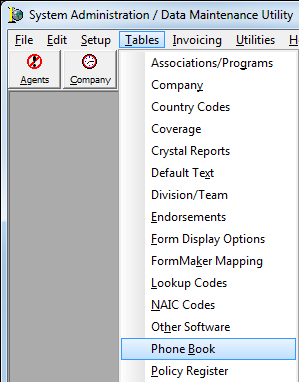
- On the Tables menu, click Phone Book, and then click the Contacts tab.
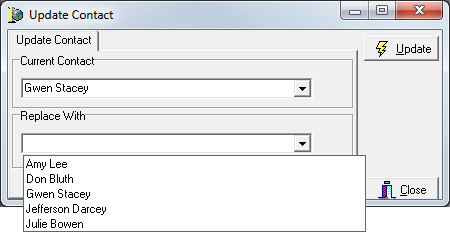
- On the Contact tab, select the contact that is to be replaced.
- Click Merge.
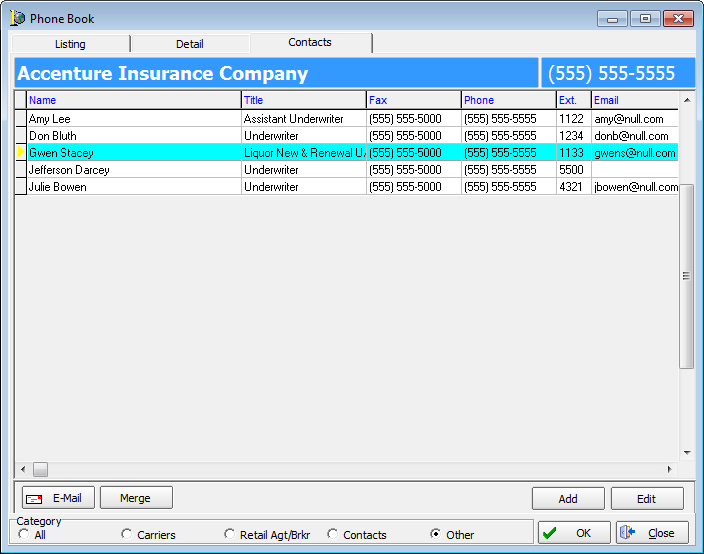
- In The Update Contact dialog box, verify the name you selected in the list is displayed in the Current Contact list. If not, select the correct name from the list.
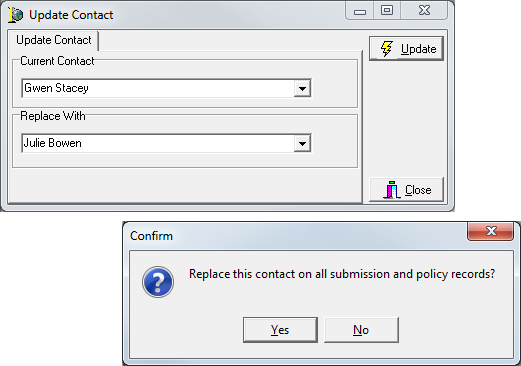
- In the Replace with list, select the contact to replace the current contact.
- Click Update.
- Click Yes in the Confirm dialog box to overwrite all applicable submission and policy records. Alternatively, you can click No to close the dialog box without updating any records.
Add a Contact
You can follow our example here to add a contact (individual's name) to a company.
- On the Tables menu, click Phone Book, and then click the Contacts tab.
- On the
Contacts tab, click the Add button.
Alternatively, you can select a contact in the list, and then click Edit to change a contact by adapting our steps.
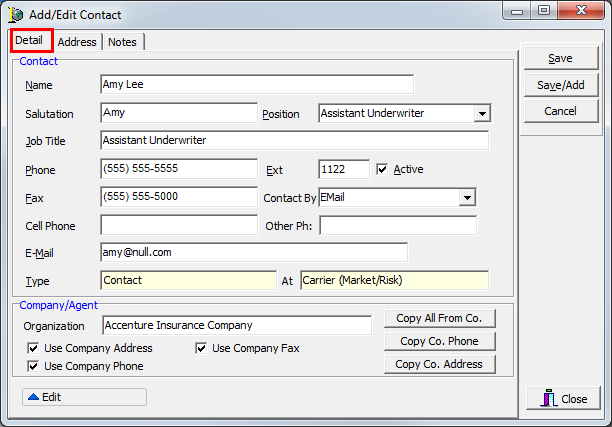
- On the
Detail tab, enter the contact's information in the Contact pane.
As opposed to entering specific contact information, you can copy the company's information and use it for the contact as explained later.- Name
- Salutation – name or title to be used when greeting the contact. Populated automatically (with the first name) when you enter the name and press Tab. Type the desired salutation in the box (e.g., Mr., Mrs., etc.).
- Position – job title or position in the company (If the position is not listed, you can leave this box blank.)
- Job Title – populated when you enter the position
- Phone – main phone number
- Ext– phone extension (if applicable)
- Active – makes contact active in AIM
- Fax – fax number
- Contact By – preferred method for contacting the person
- Cell Phone – cell phone number
- Other Ph – additional phone number
- E-mail – e-mail address
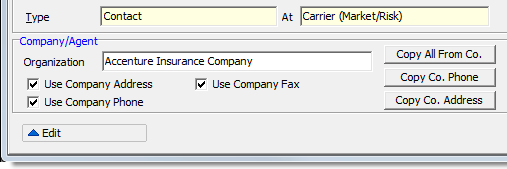
- Type – type of contact
- At – type of company
- In
the Company/Agent pane, you can use the buttons or options to copy information
from the company listing and update it as the contact's information.
If you select a option to use an item of information, only that information will be used. You can use the copy buttons to copy all the noted information and use it for the contact.- Organization – populated automatically with the company name
- Use Company Address – company address only
- Use Company Phone – company phone number only
- Use Company Fax – fax number only
- Copy All From Co. – copies all information from the company record
- Copy Co. Phone – copies company phone only
- Copy Co. Address – copies company address only
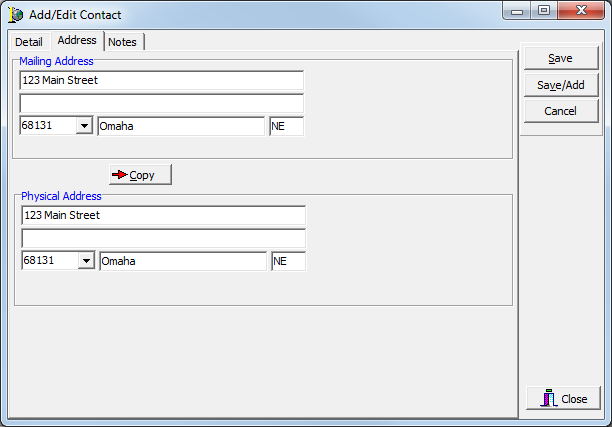
- Click
the Address tab.
- If you did not elect to use company information using the options and buttons on the Detail tab, as explained earlier, enter the address information in the Mailing Address and Physical Address panes.
- If the physical address is the same as the mailing address, click the Copy button to copy the mailing address.
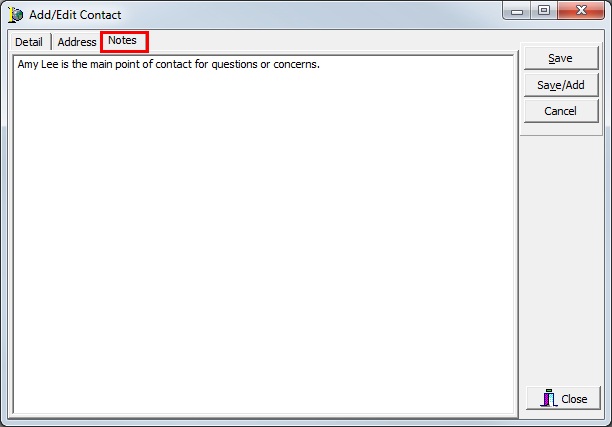
- On the Notes tab, enter any information that is pertinent to the contact.
- Click
Save to save your changes to the contact information.
Click Save/Add to save your changes and begin adding another contact. Click Cancel to close the dialog box without saving your changes.