In this topic, we continue our discussion of the Invoice Screen, which is encountered when processing an Invoice.
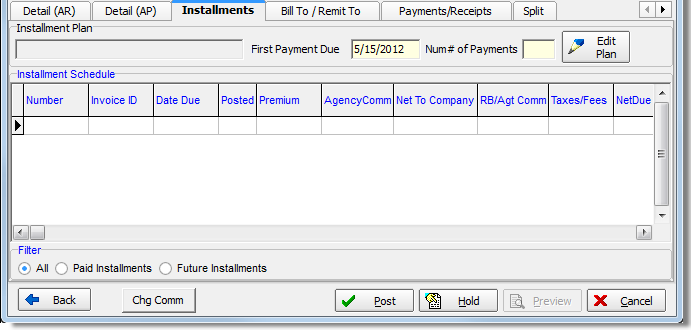
If an installment plan has been added to the policy, you can view and edit the installment plan on the Installments tab.
Details of the selected installment plan appear in the grid only after you have edited the selected installment plan, as we discuss in the steps that follow.
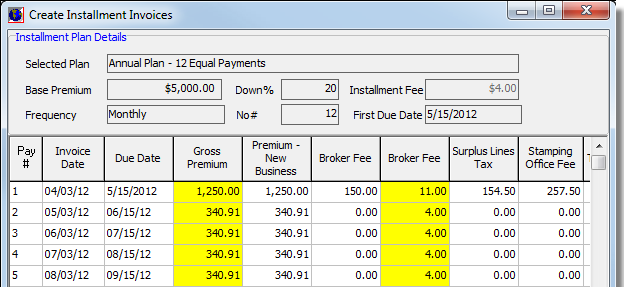
- Click Edit Plan to make changes to the Installment Plan that you selected earlier in the invoice process.

The Installment Plan Details pane located at the top of the Create Installment Invoices dialog box shows information about the selected installment plan in a read-only format. In the grid, you can make changes to the details of the plan. Information shown in the yellow columns cannot be edited, but may change depending on changes that are made to the other columns.
- To edit a column, click the desired field; type your changes, and then press Tab to move to the next field.

- Click
Print, as needed, to send the installment plan details to Document Viewer.
From Document Viewer, you can:- Export the document to PDF format.
- Send the document as an attachment to an e-mail message.
- Print the document on a physical printer.
- Click OK to save your changes and close
Create Installment Invoices.
Alternatively, you can click Cancel to abandon you changes without saving and close the dialog box.

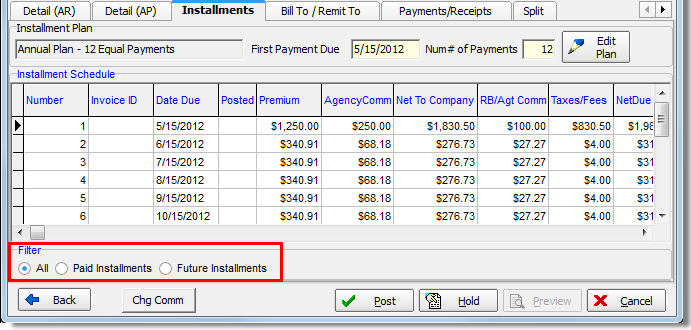
- Details
of the installment plan appear in the grid. You can manage the order
in which the installment details are displayed by selecting the appropriate
filter method in the Filter pane.
- All – all installments
- Paid Installments – only installments that have been paid
- Future Installments – installments that have not yet been invoiced
