A suspense is similar to writing a note on a file as a reminder that action needs to be taken on that file. You can add a suspense to the currently selected submission or policy record. In the steps below, we show you how to add a suspense to a record. Later, we explain how to view and edit an existing suspense.
- Select a record on the Main tab.
- On the
Tools menu, point to Suspense, and then click Add.
Alternatively, you can click the Suspense button on the tool bar or press F8.

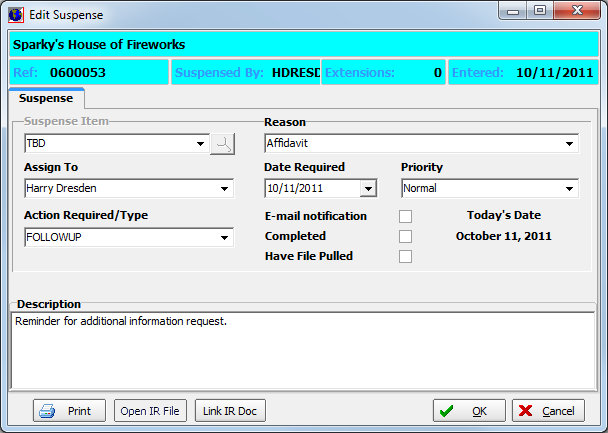
- In New
Suspense, enter the following information using the fields provided, where applicable.
- Suspense Item – type of suspense such as a reminder
- Reason – reason for creating the suspense
- Assign To – person to whom the suspense is assigned
- Date Required – date on which the
suspense is to be completed. Type the date or click
 and use the calendar to select a date.
 - Priority – level of urgency required on the suspense. Choose from Low, Normal, High
- Action Required/Type – type of action necessary to complete the suspense.
- E-mail notification – send the assigned user an e-mail message reminder
- Completed – mark the suspense as complete (available only when editing an existing suspense)
- Have File Pulled – indicates whether the file should be pulled for the submission
- Description – brief description of the suspense and/or the actions that need to be performed
- Click Print, if applicable, to print the suspense using a printer attached to the workstation.
- Click OK to add the suspense or click Cancel to abort and abandon your changes.
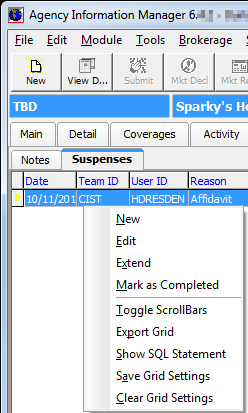
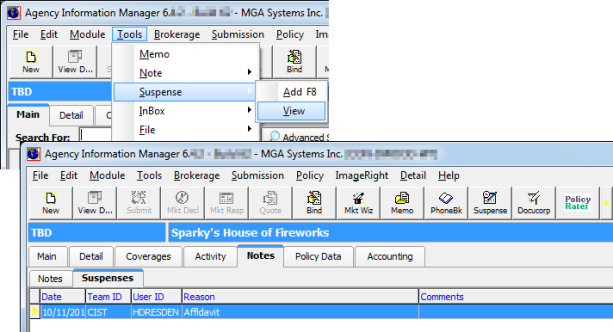
- To view or edit an existing suspense, select the policy or submission record on the Main tab.

- On the Tools menu, point to Suspense, and then click View. As an alternative, you can click the Notes tab of the selected record, and then click the Suspenses tab.
- Right-click
the suspense, and then click one of the following menu commands.
- New – create a new suspense as described above
- Edit – edit the existing suspense
as needed. If you are using ImageRight integration the following buttons
will be available to you:
- Open IR File – open ImageRight file that corresponds to the AIM policy/submission record (only available if the submission/policy record is linked to an ImageRight file)
- Link IR Doc – link the submission/policy to an ImageRight file
- Extend – use the Calendar to change the required date of the suspense
- Mark as Completed – mark the suspense as completed, that is, action required on the suspense has been performed