You can use the Chart of Accounts report to see the chart of accounts entered in the Administrative module.
Before you begin, you should refresh the database as explained in Financial Report Preparation.
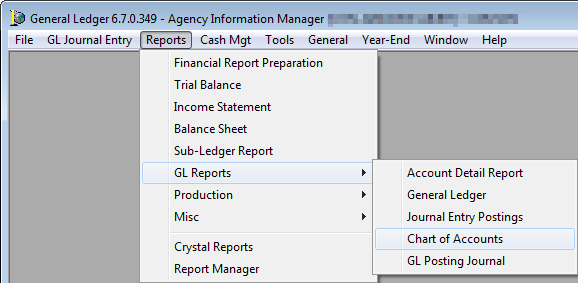
- On the Reports menu, point to GL Reports, and then click Chart of Accounts.

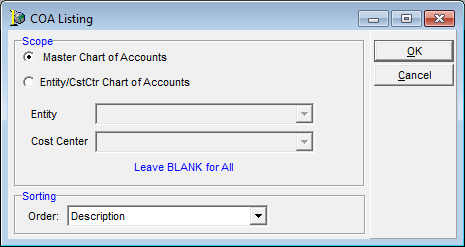
- Enter the report parameters in COA Listing.
- Scope – define the appropriate report options
- Master Chart of Accounts – master account numbers only
- Entity/CstCtr Chart of Accounts – entity, cost center, and master account numbers, and then enter, as appropriate the:
- Entity
- Cost Center
- Sorting – define the sort order of the report
- Account
- Description
- Type
- Account, Description
- Account, Type
- Entity, Account, Cost Center
- Entity, Cost Center, Account
- Entity, Cost Center, Description
- Scope – define the appropriate report options
- Click OK to create the report.

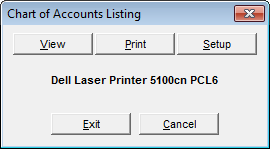
- Click the appropriate button in Chart of Accounts Listing.
- View – view the report
- Print – print the report
- Setup – change the printer setup
- Exit – close the report
- Cancel – cancel the view and print options

For additional information about printing and exporting reports, see Printing and Exporting Reports.