| This feature, or some fields and options described, might not be available depending on your settings, security rights, or platform package. |
Create a Policy Change Request in eForms Manager using policy change and comparison information from the Policy data entry form. Once the form is created you can enter additional information directly on the form. The form can then be saved, attached to an activity, viewed, and accessed at any time. You can even copy the form to create a second request or to send corrected and updated information.
The information you enter directly on the Policy Change Request in eForms Manager using the editing feature is saved with the form in eForms Manager. The data is not saved in the policy database and does not flow back to the policy data entry form.
![]() Accessing the Policy Change Request
Accessing the Policy Change Request
Open the customer for whom you want to create a Policy Change Request, and then launch eForms Manager in one of the following ways:
From the Customer Center menu, click eForms > eForms Manager.
From the Policy, Line of Business, or Claims data entry forms menus, click Operation > eForms Manager.
Click the eForms Manager icon from the toolbar when available.
If you did not open eForms Manager from the policy data entry form, choose the policy and transaction effective date for which you want to create a Policy Change Request. If the selected policy and transaction detail does not appear, click Refresh.
From the eForms Manager menu click eForms > Policy Change Request > New. The New Change Request selection form appears.
To view a Policy Change Request, double-click it from the tree control. The form opens in the right-hand pane for viewing.
![]() Creating a New Policy Change Request
Creating a New Policy Change Request
If you launched eForms Manager from the policy data entry form, skip to step 2.
From the eForms Manager tree select the policy that you want to use to create a Policy Change Request.
The latest transaction date fills to the form.
From the menu click Create > Policy Change Request > New. The New Change Request selection form appears in the right pane of the window.
Complete the New Change Request as follows:
Verify or select the Form Type and/or the Request Type.
Verify or select a customer, company, and agency contact.
Enter an agency message.
Verify or select the recipients.
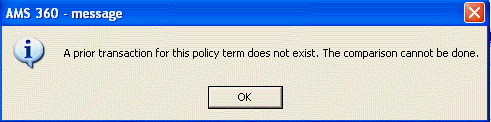
Expand the Memo Text section, select a Policy Comparison Option, and click Insert Changes. Then add additional text, if needed.
See the New Policy Change Request Selections in this topic for definitions of these fields.
When you have made your selections click Create in the upper right corner of the New Change Request selection form. The Policy Change Request is created, displays in the view pane, and appears in the Policy Change Request directory in the tree.
To enter information on the form, click the Edit icon on the toolbar or from the menu click File>Edit. The form appears with shading in the areas where you can enter information.
The data you type on the form is saved with the form in eForms Manager. The data is not saved in the policy database and does not flow back to the policy data entry form.
When you have finished entering the information click the Save icon on the toolbar or from the menu, click File>Save. The edited form is saved and appears in the Policy Change Request directory in the tree.
To save a point-in-time view of the Change Request you can log an activity and attach the form. For more information see Forms Activity.
![]() New Policy Change Request Selections
New Policy Change Request Selections
After selecting Policy Change Request > New from the Create menu, the New Change Request selection form appears with the following:
|
Field/Selection |
What is this? |
||||||||||
|
Form Type |
Select the form for the New Change Request you are creating. The options are:
All selection fields for the New Change Request appear when you select the AMS Change Request. Limited fields are available for other form types. |
||||||||||
|
Request Type |
This field is available for the AMS Change Request form type only. Choose the type of request you are creating. The type you select appears in the heading of the form. The options are:
|
||||||||||
|
Regarding |
Enter a brief description about why you are sending the change request. This information appears in the Regardingsection of the memo. |
||||||||||
|
Insured |
This group is available for the AMS Change Request form type only.
|
||||||||||
|
Company |
This group is available for the AMS Change Request form type only.
|
||||||||||
|
Agency Contact |
This field is available for the AMS Change Request form type only. The account representative pre-fills here. You can select another from the list who should be contacted if further information is needed. The names of account executives and representatives appear in the list. |
||||||||||
|
Agency Message |
This field is available for the AMS Change Request form type only. Use this section to enter a special message that appears next to the Recipient information. |
||||||||||
|
Note/Message |
|
A printed hard copy of the Change Request will automatically be generated for each of the names that appear in the Recipients grid. You can add, edit, or delete recipients.
The first two rows of the grid display the customer and company information. You can delete these recipients, if you do not need to send them a printed copy.
|
Field |
What is this? |
||||||||||||
|
Category |
Use this field to narrow the list of recipients to choose from. Select a category from the list. The options are:
|
||||||||||||
|
Name |
This field appears only when you select Company as the category. Choose the name of the company from the list. |
||||||||||||
|
Recipient |
The information available in this list varies based on the Category you selected. The following chart provides information on the selections available:
|
||||||||||||
|
Name and Address |
|
|
Field |
What is this? |
||||||||||||||||
|
Policy Comparison |
When you launch a Policy Change Request, the Memo Text section defaults as expanded, with the most recent policy change comparison notes automatically inserted.
|
||||||||||||||||
|
Text Box |
If changes exist for the option you selected in the Policy Comparison section, then those changes will fill to the text box and can be changed. You can then add more information, if desired. The text you type in this area does not word wrap until you click Createand the form is generated. |
![]() Copying a Policy Change Request
Copying a Policy Change Request
If you launched eForms Manager from the policy data entry form, skip to step 2.
From the eForms Manager tree select the policy and effective date that contains the Change Memo you want to copy. Click Refresh if necessary.
From the menu click Create > Policy Change Request > Copy. The Copy Change Request selection form appears in the right pane of the window.
Select the Change Request you want to copy from the Available Forms grid. Choose a Request Type, enter the additional information, if applicable.
See theCopy Change Request Selectionsin this topic for definitions of these fields.
When you have made your selections click Create in the upper right corner of the Copy Change Request selection form. The Change Request is copied, appears in the Policy Change Request directory in the tree, and appears in the right pane of the window for viewing.
To enter the information on the form, click the Edit icon on the toolbar or from the menu click File > Edit. The form appears with shading in the areas where you can enter information.
The data you type on the form is saved with the form ineForms Manager. The data is not saved in the policy database and does not flow back to the policy data entry form.
When you have finished entering the information click the Save icon on the toolbar or from the menu, click File>Save. The edited form is saved and appears in the Policy Change Request directory in the tree.
To save a point-in-time view of the Change Request you can log an activity and attach the form. For more information see Forms Activity.
![]() Copy Policy Change Request Selections
Copy Policy Change Request Selections
After selecting Policy Change Request > Copy from the Create menu, the Copy Change Request selection form appears with the following selections:
|
Field/Selection |
What is this? |
|
Available Forms |
From the grid select the Policy Change Request you want to copy. |
|
Request Type |
This field is available for the AMS Change Request form type only. Choose the type of request for the copied Change Request. The type you select appears in the heading of the form. The options are:
|
|
Regarding |
Enter a brief description about why you are sending the change request. The information you enter appears in the Regardingsection of the memo. |
|
Agency Contact |
This field is available for the AMS Change Request form type only. The account representative pre-fills to this field. You can select who should be contacted if further information is needed. The names of the account executives and representatives appear in the list. |
|
Agency Message |
This field is available for the AMS Change Request form type only. Use this section to enter a special message that appears next to the Recipient information. |
Do you need more information on printing or emailing the form? See eForms Manager Print Options or eForms Manager Email Options.
|
My Vertafore Support | Vertafore University | NetVU Network | Vertafore.com © 2015 Vertafore, Inc. and its subsidiaries. All Rights Reserved. Vertafore, the Vertafore design, AMS360, Vertafore Producer Advantage, Producer Plus, AgencyEDGE, ReferenceConnect, BenefitPoint, Engage, and WorkSmart are registered trademarks of Vertafore, Inc. or its subsidiaries. Third party marks belong to their respective holders. AMS360 Classic Help updated 5/18/2016 11:00 PM |