When you need to share information in your ImageRight system with someone who does not use ImageRight, you will find the Send To Directory command helpful. For example, you may need to send medical bills to someone outside of your company for review.
Using Send To Directory, you can export any part of a file, for example, documents, pages, etc., to a directory outside of ImageRight. Once the items are exported, you can deliver them in the manner that works best for you.
As you might guess, there are a number of ways that you may make exported items available for viewing by others. For example, the files may be shared on a network or copied to a CD-ROM (compact disc) or DVD (digital versatile disc).
You might find it helpful to review Send To before you continue. In that topic, we provide details about changing the appearance of the Send To dialog box, changing the order of attachments, accessing and using menus, and more.
Selecting the items is as simple as a point and click of the mouse. When you prepare the items that you would like to export, it is best to complete all of your selections before you continue the export process. However, we will explain how to add items that were not selected in Desktop when you began. You will find this helpful if you need to export items from multiple files.
- Select the items in Desktop that you would like to export. You can select consecutive items by clicking the first item, holding down Shift, and then clicking the last item. To select items that are not consecutive, press and hold down Ctrl then click each item.
- On the
File menu, point to Send To, and then click Directory. As an alternative,
click
 on the toolbar.
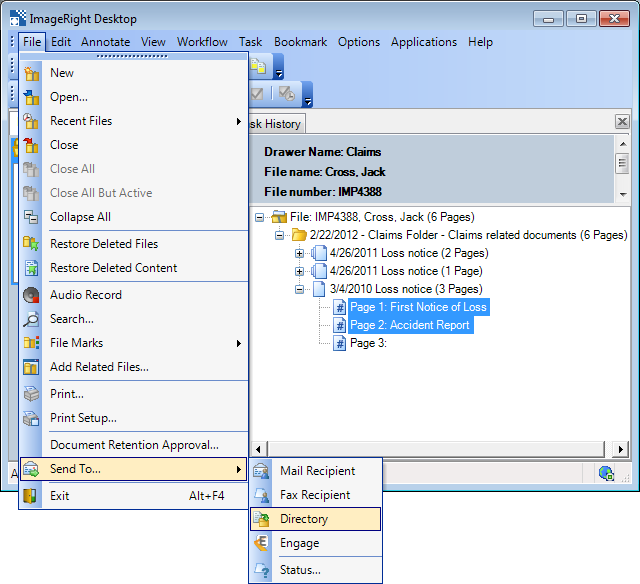
- The selected
items will appear in the Convert or Send as Native list. If you don't
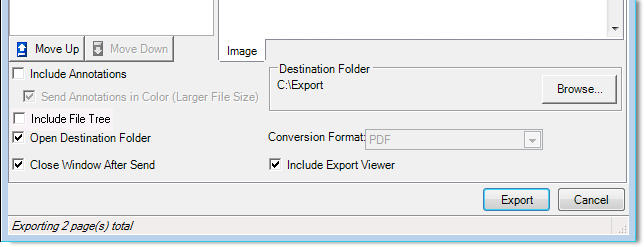
see the Send as Native list, clear the Include Export Viewer option at
the bottom of the dialog box.
- The items in the Convert list will be converted to the format that you select as explained later when exported.
- Items in the Send as Native list will not be converted. This means you can export items in their native format. For example, you can export a word processing document without it being converted to PDF. If you send a document in this manner, the person receiving the document will be able to edit the document as needed, provided she has access to the related program.
- To move items between the lists, simply drag them from one to the other and drop them in the appropriate location. The yellow arrow indicates the placement of the item being moved.
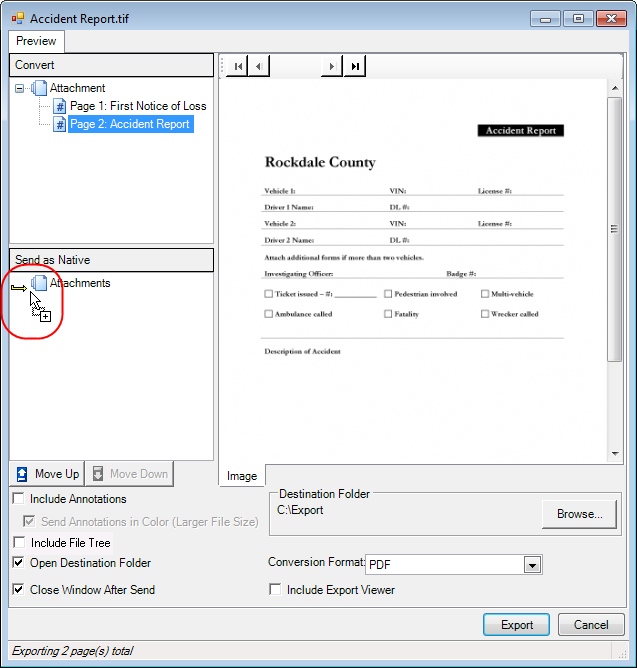
- You can
drag items from an ImageRight file and drop them in the list of attachments.
- Move the Send To Directory dialog box so that you can see Desktop.
- Open the file that contains the items that you want to export.
- Drag
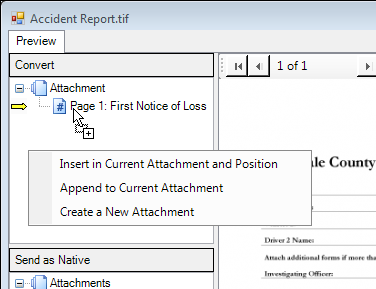
the items to the Convert or Send as Native list. The yellow arrow that
appears will help you position the items. When the menu appears, choose
the correct command for the final placement of the attachments. If the
menu doesn't appear, clear the Include Export Viewer option, and start
the drag operation again.
- Insert in Current Attachment and Position to place the images between others
- Append to Current Attachment to place the images in the last position of the attachment
- Create a New Attachment to add another attachment to the list to which items can be added
- Based
on the descriptions that follow, select the appropriate options at the
bottom of the dialog box.
- Include
annotations – Annotations
on the selected items will be included in the exported copies.
- When sending password-protected PDFs with annotations, the PDF must be moved from the Send as Native list to the Convert list before sending. The converted PDF will not be password protected when it is opened in the destination.
- For information about the types of PDF files for which annotations can be included, see Split PDFs into Individual Pages.
- Send annotations in color – Included annotations will be in color as opposed to monochrome. The size of the exported file will be larger, so consider the use of this option carefully.
- Include File Tree – The file tree directory (PDF bookmarks) in a PDF file will be included.
- Open destination folder – The folder to which the items are exported will be opened automatically.
- Close window after send – The Send To Directory dialog box will be closed automatically when the export is complete.
- Destination
folder – Click Browse
and locate the folder to be used to store the exported items.
- The Browse for Folder dialog box will open.
- Locate the directory that you want to use and click OK.
- Click Make New Folder if you would like to create a new folder. You can right-click the new folder and click Rename if you need to change its name.
- The path to the directory is remembered until you change it again.
- Conversion
format – Select the
format to which the items in the Convert list should be changed when they
are exported. The selected format is remembered until you change it again.
- PDF (Portable Document Format) – A file that can be viewed on different computer platforms using a PDF viewer, typically Acrobat Reader.
- Single-page B/W TIFF – Each page of each attachment will be converted to a black and white, single page TIFF.
- Single-page color TIFF – Each page of each attachment will be converted to a color, single-page TIFF.
- Single-page gray scale TIFF (Tagged Image File Format) – Each page of each attachment will be converted to a non-color, single-page TIFF.
- Multi-page B/W TIFF – The pages in the attachment will be converted to one black and white, multi-page TIFF, that is, one TIFF for each attachment.
- Multi-page color TIFF – The pages in each attachment will be converted to one color, multi-page TIFF, that is, one TIFF for each attachment.
- Multi-page gray scale TIFF – The pages in each attachment will be converted to one non-color, multi-page TIFF, that is, one TIFF for each attachment.
- Include Export Viewer – A viewer that can be used to view exported files. Typically, the viewer is used by people who do not have ImageRight Desktop installed (see ImageRight Export Viewer).
- Include
annotations – Annotations
on the selected items will be included in the exported copies.
- Click Export to complete the process or Cancel to close the dialog box without exporting the items.
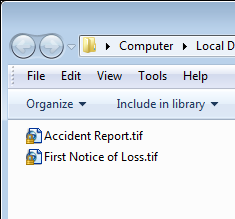
If you selected the Open destination folder option, you will see a folder similar to the one shown in our example. In our example, we exported two items as TIFF images.
We explain how to use the viewer that you can include in your export in ImageRight Export Viewer.