Coverage Templates
In this topic, we continue our discussion of the Underlying tab, encountered when creating a New Submission.
Using Coverage Templates, you can select a template to fill the grid with standard information that might apply to specific types of submissions that your agency processes on a regular basis. If you do not have a template that meets your needs, you can create one. These coverage templates can work in conjunction with Grid Designer to populate the columns that you created.
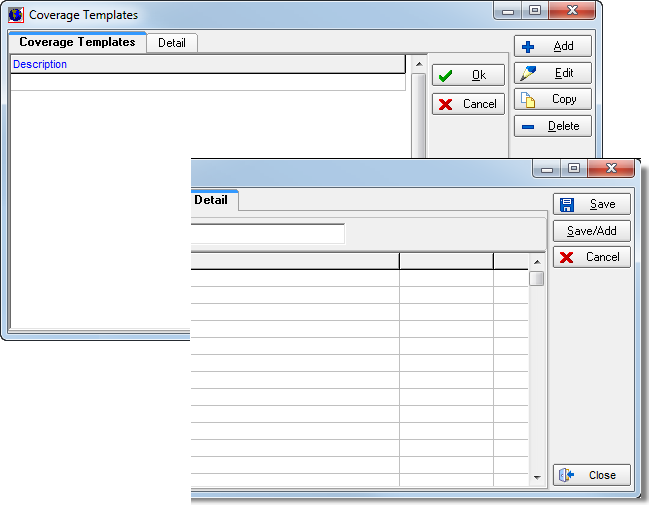
Each of the buttons shown on the Coverage Templates and Detail tabs are described in the table below.
|
Button |
Function |
|---|---|
|
|
Add a new coverage template |
|
|
Edit the selected coverage template |
|
|
Copy the selected coverage template |
|
|
Delete the selected coverage template |
|
|
Save changes and close Coverage Templates |
|
|
Abandon changes and close Coverage Templates |
|
|
Save changes to a template |
|
|
Save changes to a template and add a new template |
|
|
Close Coverage Templates |


In the steps that follow, we show you how to add a new template to Coverage Templates. You can modify our steps to edit existing templates as needed.
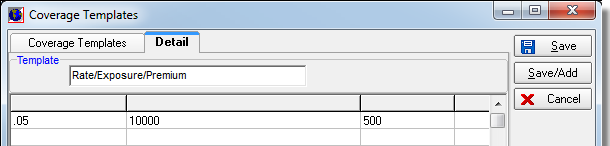
- In the Template box located on the Detail tab, type the name of the template that you are adding.
- Click
in each column and type the values that you want to appear in the grid
on the
If you have created a custom grid using Grid Designer, the values that you enter here will serve to populate your custom grid. - Click Save to save your changes.
Your newly saved template information appears in the grid on the Underlying tab.