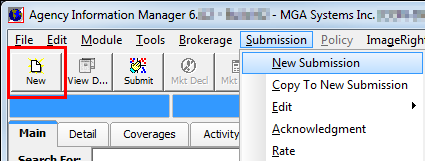
The New Submission command, located on the Submission Menu, is used to create a new submission for a new or existing insured.
- On the
Submission menu click New Submission.
Alternatively, you can click the New button on the toolbar.
- Perform a search for the insured using the steps outlined in Insured Clearance Search.
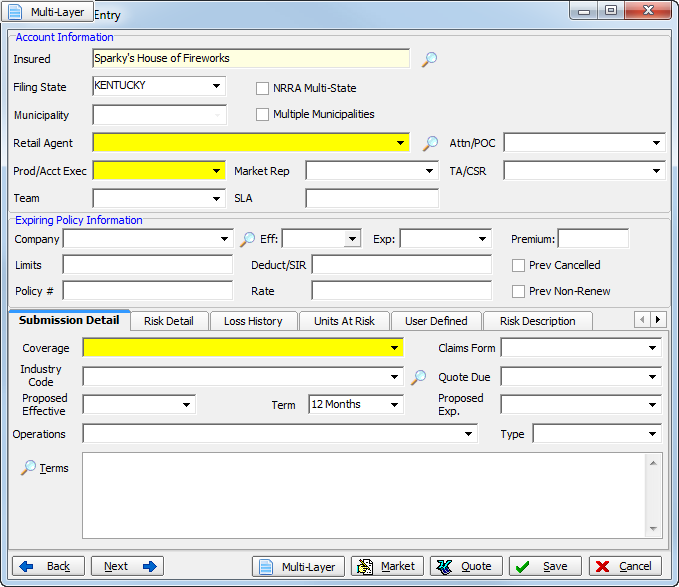
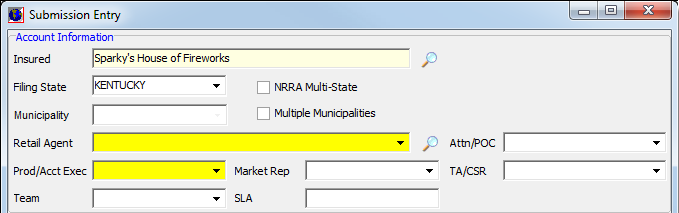
- Once the insured has been selected, or a new insured has been added to the AIM system, Submission Entry will be presented. Verify that the name of the insured is correct.
|
Fields appearing in yellow are required fields. They must be populated to complete the submission entry. |
In the table that follows, we discuss each of the Submission Entry buttons and their function.
|
Button |
Function |
|---|---|
|
|
Moves back to Add Edit Named Insured (see New Insured) |
|
|
Moves to Submission Entry – Quote Detail – Pg. 2; explained in Quote |

|
Opens Layered Policy Schedule |
|
|
Opens Submit to Mkts |
|
|
Moves to Submission Entry – Quote Detail – Pg. 2; explained inQuote |
|
|
Scroll tabs to the left |
|
|
Scroll tabs to the right |


- Click
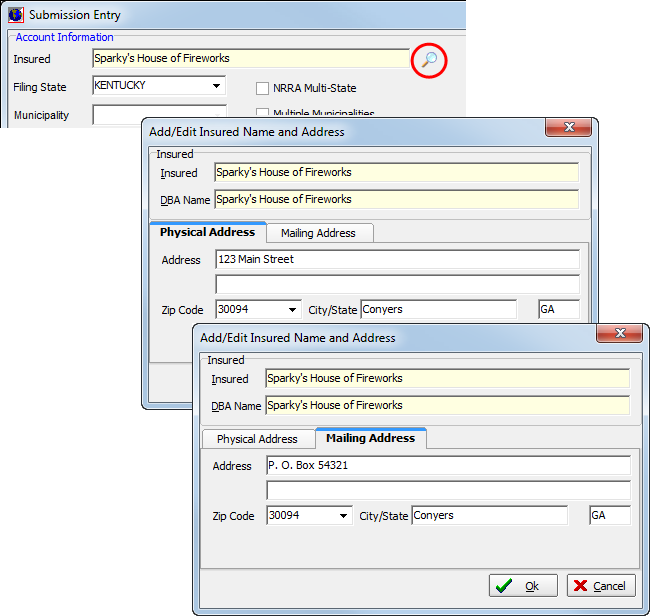
 to the right of the Insured box to edit the insured's name, physical address,
and mailing address information, if applicable.
to the right of the Insured box to edit the insured's name, physical address,
and mailing address information, if applicable. - Click OK.
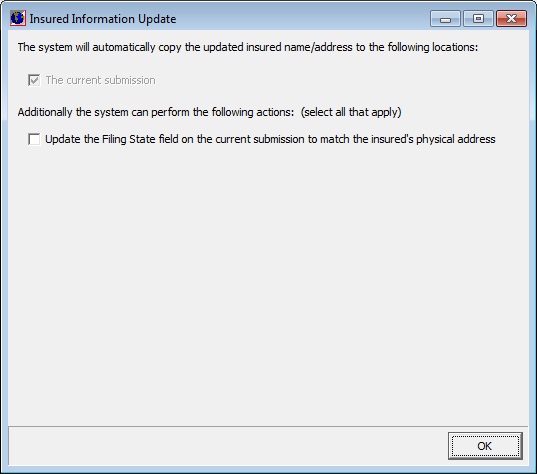
- If you are editing an existing insured, the Insured Information Update dialog box is displayed. Select the Update the Filing State field on the current submission to match the insured's physical address option, if applicable.
- Click OK.
- In the
Account Information pane, provide the following information.
- Filing State – state for which SLA taxes will be calculated (populated automatically based on the physical address of the insured)
- NRRA Multi-State – multi-state taxes for Non-Admitted and Reinsurer's Reform Act (NRRA) compliance apply. Refer to the Multi-State Taxes NRRA workflow for more information on NRRA compliance.
- Municipality – municipality of the insured (This option is only active when a state with multiple municipalities is selected.)
- Multiple Municipalities – Multi-Municipality Tax Distribution is enabled as described in Managing Multiple Municipality Taxes
- Retail Agent – retail agent/broker
(Click
to search for a retail
agent/broker.)
- Attn/POC – agent/broker contact person
- Prod/Acct Exec – agency’s assigned account executive
- Market Rep – agency’s marketing representative
- TA/CSR – agency’s account assistant
- Team – team of the Prod/AcctExec
- SLA – insured's Surplus Lines Association (SLA) tax number
- In the
Expiring Policy Information pane, using the boxes provided, enter information
about the preceding policy, if applicable.
- Company – name of prior carrier.
Click
to perform an National Association of Insurance Commissioners (NAIC) company
search using the search process explained in Understanding Searches in AIM. - Eff – effective date
- Exp – expiration date
- Premium – policy premium
- Limits – policy limits
- Deduct/SIR – policy period deductible or self-insured retention (SIR)
- Prev Cancelled – previous policy was cancelled
- Policy # – policy number
- Rate – policy rate
- Prev Non-Renew – previous policy was non-renewed
- Company – name of prior carrier.

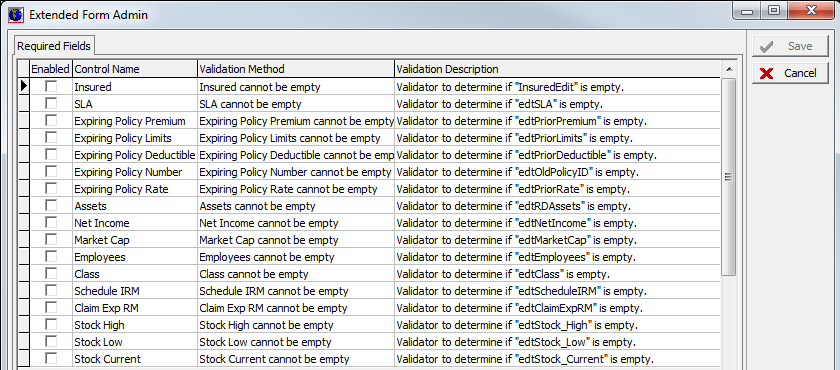
If you have a permission level of 9, you will see the Admin button on the title bar of the Submission Entry dialog box. This button is used to specify which fields are required in the submission entry workflow.

- In the Extended Form Admin dialog box, select the fields to set as required fields, and then click Save.
We continue our discussion of creating a new submission in the topics shown below.