You will frequently be presented with opportunities to write quotes and policies for new people or businesses. When performing an Insured Clearance Search, you have the option of adding a new insured to the AIM system. We will show you how to add a new insured. You can modify these steps to edit an existing insured record. With practice, you will be able to add and edit insureds to your AIM system on your own, as needed.
- In the
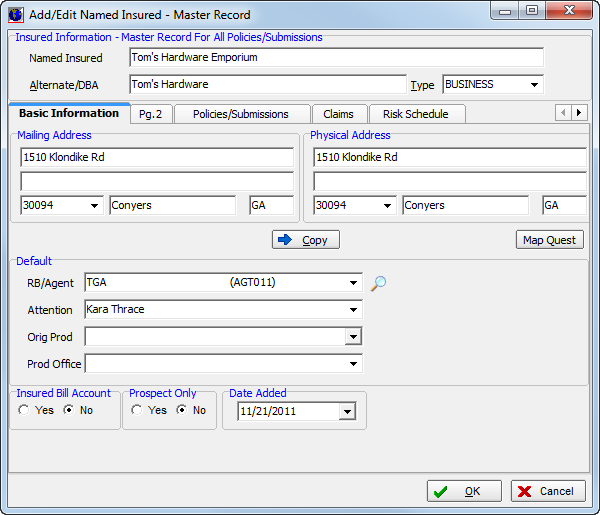
Insured Information – Master Record For All Policies/Submissions pane,
enter the following information:
- Named Insured – name of the insured
- Alternate/DBA – Doing Business As (DBA) name of the insured
- Type – insured type
- On the
Basic Information tab, provide the following information in the boxes provided.
- Mailing Address – insured's mailing address, including zip code, city, and state
- Physical Address – insured's physical address, including zip code, city, and state
- Click the Copy button to copy the mailing address to the physical address if they are the same.
- Click
 on
the Show Map button to view the physical address using one of the following
map websites:
on
the Show Map button to view the physical address using one of the following
map websites:- Google Maps
- MapQuest
- Rand McNally
- Yahoo Maps
- In the
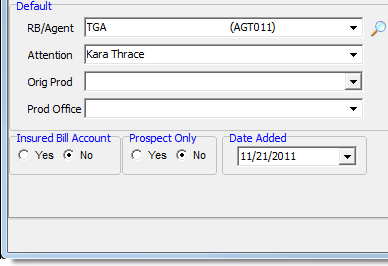
Default pane, enter the following information in the boxes provided to establish defaults for the new insured.
- RB/Agent – retail agent/broker (Click
 to use perform a retail agent/broker search.)
 - Attention – name of contact at retail agent/broker (Type a new name to add a new contact.)
- Orig Prod – name of your agency’s original producer for this submission, if applicable
- Prod Office – name of association or group this submission belongs to, such as a mass merchandising group, if applicable
- RB/Agent – retail agent/broker (Click
|
|
- The Prospect Only pane is used in conjunction with the Prod Office list. Select whether the insured is a prospective customer only.
- In the
Date Added pane, the current date is selected automatically. Click to use the Calendar to select a different date,
if necessary.
- Click OK.
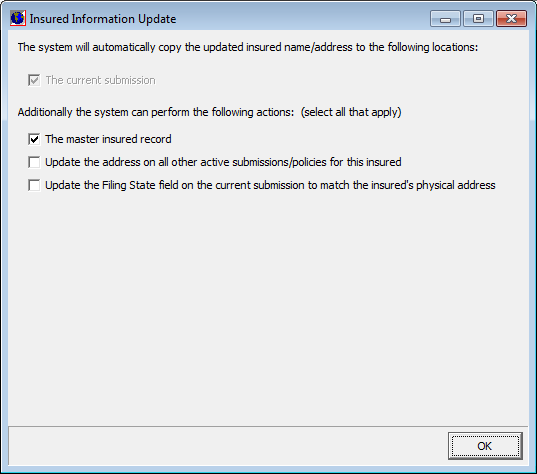
- If you are editing an existing master record, you will see the Inured Information Update dialog box. Select the appropriate options.
- The master insured record (selected by default)
- Update the address on all other active submissions/policies for this insured
- Update the Filing State field on the current submission to match the insured's physical address
- Click OK.
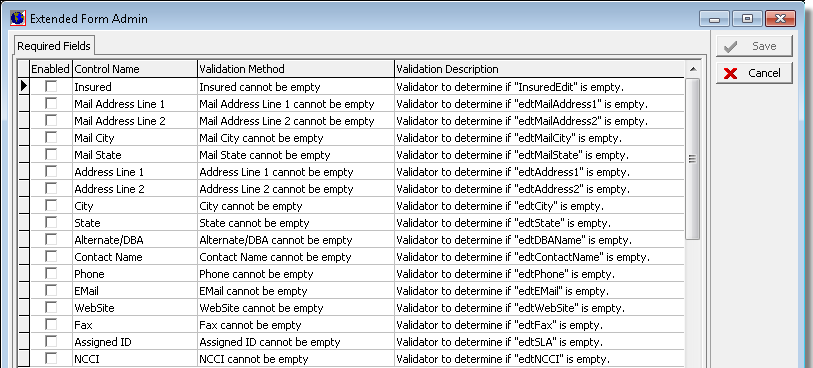
If you have a permission level of 9, you will see the Admin button on the title bar of the Add/Edit Named Insured – Master Record dialog box. This button is used to specify which fields are required in the submission entry workflow.

- In the Extended Form Admin dialog box, select the fields to set as required fields, and then click Save.
We continue our discussion in the topics that follow.