The Suspense Listing dialog box contains a listing of those items marked for future action. Issuing a suspense is similar to writing a note on a file to remind you of a pending action. By using the Suspense Listing module, you can greatly improve the organization of your workflow.
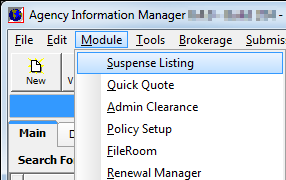
- On the Module menu, click Suspense Listing.
Suspenses are displayed in the grid layout. In the following table, we discuss the functions of the buttons displayed in the Suspense Listing dialog box.
|
Button |
Function |
|---|---|
|
|
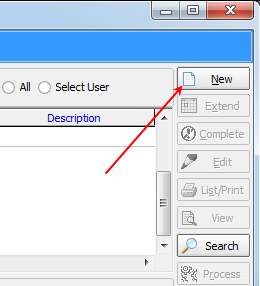
Add a new suspense |
|
|
Extend the selected suspense using the Calendar |
|
|
Complete the selected suspense and leave the Suspense Listing dialog box open. To select multiple records for completion, press and hold Ctrl and click each record. To select a block of records, select the first record, press and hold Shift, and then single-click the last record in the group. |
|
|
Edit the selected expense |
|
|
View a printable list of the displayed suspenses |
|
|
View the selected suspense entry |
|
|
Search for suspenses using the search method explained in Understanding Searches in AIM |
|
|
Complete the selected suspense and close the Suspense Listing dialog box |
|
|
Close the Suspense Listing dialog box |


- In the
Show For pane located in the Suspense Listing dialog box, select the appropriate
filter to control the information displayed. The filter is used to display
suspenses based on the required date of the suspense.
- Day – required date is today's date
- Week – required date falls within this week
- Month – required date falls within this month
- To Date – required date has already passed
|
Suspenses shown in red text are overdue, that is, the required date of the suspense is in the past. All current suspenses are shown in black text. |
- In the
Show By pane, select the appropriate option to display the corresponding
suspenses.
- User – user currently logged on to AIM
- Team – team associated with the user logged on to AIM
- Division – division associated with the user logged on to AIM
- All – all suspenses within your agency
- Select User – select the user from the User list in the Select User dialog box.
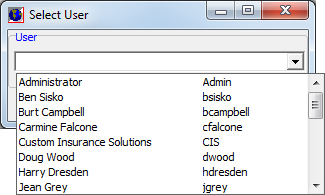
|
Some options may not be available depending on the security level of the person logged on to AIM. Refer to the Data Maintenance Utility help file for additional information about user security levels. |

- The listing
of suspenses can be further filtered by choosing from the following options:
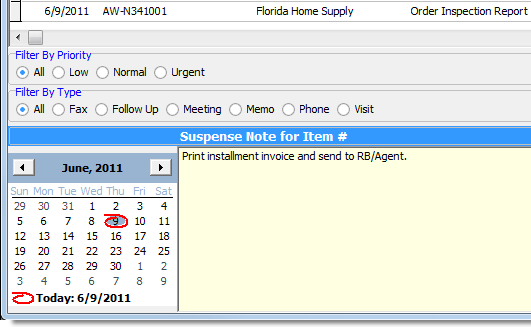
- The Filter
By Priority pane is used to filter suspenses based on priority. Select
the appropriate option to display the suspenses based on the following
descriptions:
- All – all priorities
- Low – marked as low priority
- Normal – marked as normal priority
- Urgent – marked as urgent
- The Filter
By Type pane is used to filter suspenses based on the means of contact.
Select the appropriate option to display the suspenses based on the following
descriptions:
- All – all contact methods
- Fax – follow up by fax
- Follow Up – marked as Follow Up
- Meeting – follow up with a meeting
- Memo – follow up with a memo
- Phone – contact by telephone
- Visit – follow up with a visit
- The Filter
By Priority pane is used to filter suspenses based on priority. Select
the appropriate option to display the suspenses based on the following
descriptions:
- You can use the Calendar located in the bottom left corner of the dialog box to filter the list of suspenses by date.
- In the Suspense Note for Item # box, you can view the suspense note for the selected suspense.
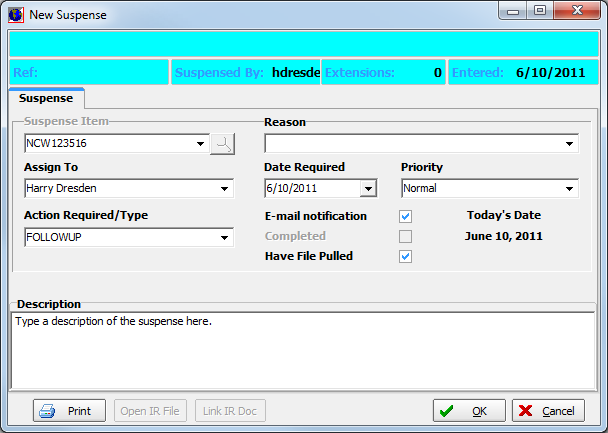
We will show you how to add a new suspense from the Suspense Listing dialog box. You can use the information presented to edit existing suspenses.
- Click New to create a new suspense.
- In the
New Suspense dialog box, enter information relevant to the suspense.
- Suspense Item – submission or policy number, alternatively, you can select Reminder/To Do from the list
- Reason – select a reason for the suspense
- Assign To – user responsible for follow up
- Date Required – date required for
follow up. Type the date or click
 to use the Calendar.
 - Priority – choose from Low, Normal, or Urgent
- Action Required/Type – describes what needs to be done to follow up
- E-mail Notification – automatically send an e-mail message from Microsoft Outlook to the assigned user advising that a suspense has been created.
- Completed – mark the suspense as completed. Only available when editing a suspense.
- Have File Pulled – display this record in the FileRoom
- Description – notes regarding the suspense
- Click Print to print a copy of the suspense on the computer's default printer.
- If AIM
is integrated with ImageRight, click:
- Open IR File to open the document in the linked ImageRight file.
- Link IR Doc to link this suspense record to an ImageRight document.
- Click OK to save your changes and close the New Suspense dialog box, or click Cancel to close the dialog box without saving your changes.