Typically, a workflow contains an index step. Documents can be added to an index step when they are added to ImageRight by a scanner, an import, by attaching files, etc. The person (indexer) who processes the document updates specified information based on the requirements of the workflow. This updated information dictates the path the task (document) will follow as it continues through the workflow. Document indexing provides a quick, systematic way of processing tasks in an index step, that is, a method for entering the required information.
After you start document indexing, the tasks (documents) in the index step will be presented automatically. As you enter the index information and release a task, the next task in the list will be presented. This continues until all the tasks in the index step have been completed, or you end the process.
|
In addition to the document indexing method explained here, you can also utilize the Auto Process command to systematically process workflow tasks. |
- Click the To Do List tab if it is not already displayed.
- Select
the necessary search criteria to locate the tasks that you want to index.
- Workflow
- Step (select the Index step)
- User name
- Click Auto Process on the toolbar.
- In the
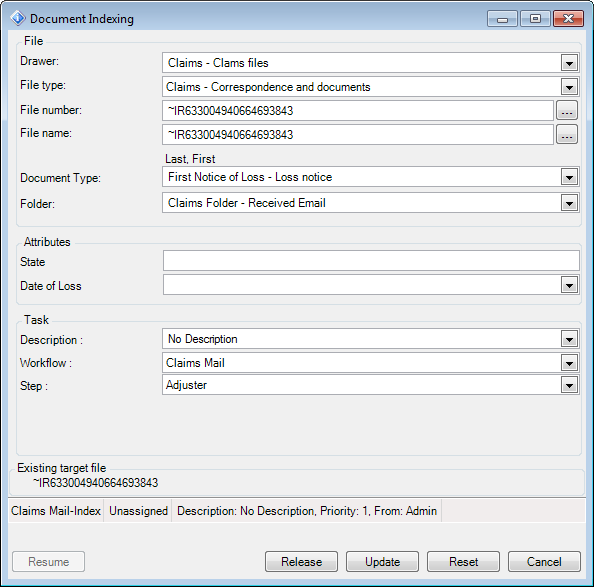
Document Indexing dialog box, enter the necessary information based on
your organization's requirements. The information you enter will dictate
where the document is stored and the path the task will follow in the
workflow. To enter information, click
 , and then
click an item in the list.
 - The Attributes pane will appear if you organization associates attributes like state, policy type, agent name, etc., with the Index step in the workflow. To update the attribute value, type the information in the field or select the value in the list.
- In the
Task pane, you can enter:
- A description to be applied to the task, often used to define the work that needs to be done. Previously used descriptions may also be selected from the list.
- The workflow to which the task should be moved.
- The next step in the workflow that the task should travel to.
- Click
the appropriate button.
- Resume – restart document indexing after viewing an unrelated file in Desktop.
- Release – release the indexed task (next task will be presented).
- Update – save the changes without releasing the task.
- Reset – remove any unsaved changes.
- Cancel – end document indexing.
If you do not know the file number or file name when you are indexing documents, you can find them using the lookup functionality. In our example that follows, we are going to explain how to lookup a file number. You can easily modify our steps to lookup a file name.
|
You can use wildcard characters in your search for a file number or file name as explained in Using Wildcard Characters. |
- In
the Document Indexing dialog box, click
 next to
either the File number or File name box to open the File Lookup dialog
box. Alternatively, you may use the following keyboard shortcuts:
next to
either the File number or File name box to open the File Lookup dialog
box. Alternatively, you may use the following keyboard shortcuts:- Ctrl+Shift+3 – file name
- Ctrl+Shift+5 – file number

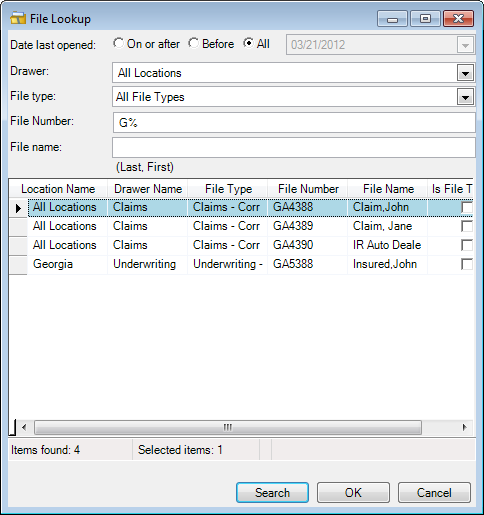
- The Date
last opened selection defaults to All. If you want to narrow your search
based on the date the file for which you are searching was last opened.
- Select the appropriate option (On or After or Before).
- Enter the comparison date in the box or click the down arrow and select the date on the calendar. You can click the right and left arrows to advance the calendar or click Today to jump to the current date.
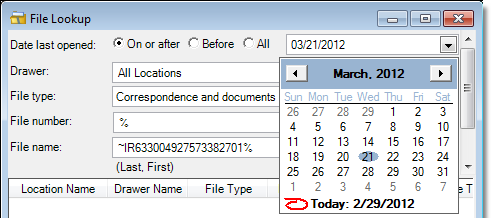
- Enter the file related information in the remaining boxes. In our example, we are searching for all files in all locations that begin with the letter G by using G%. Alternatively, you could enter only G because the % at the end of an entry is applied automatically. We could narrow the search by entering additional information, for example, a drawer name or specific file type.
- Click Search.
- To associate
a file in the list with the document, do one of the following:
- Select the file and click OK.
- Double-click the file.
|
You can customize the columns in the File Lookup dialog box as explained in Change the Column Layouts. If you elect to display file attributes, only the attributes related to the selected file type will be displayed in the columns. |
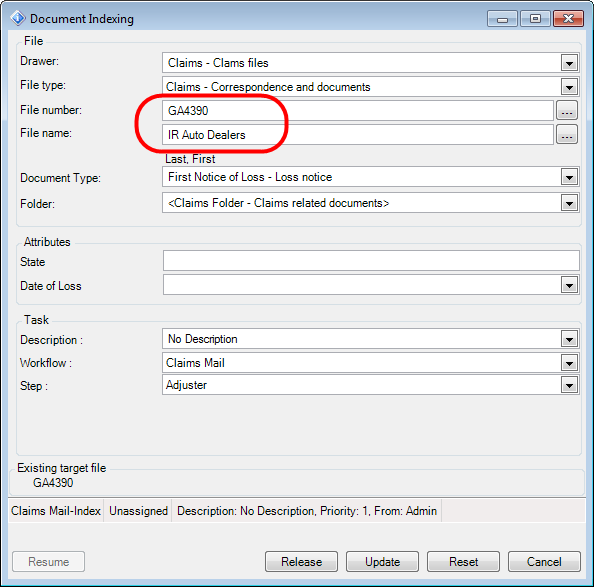
- The information in the Document Indexing dialog box will be updated based on the file that you select.
When using the drop-down lists, you can filter the list of document types and folder types to make it easier to find the items you need.
- You can enter the first letter of the document type or document description in the Document type list box. A list of matching documents will be presented. You can filter the list further (reduce the number of items in the list) by typing additional letters in the list box.
- When you select a document type, the Folder field will be populated automatically to display the folder in which the document will be stored. If multiple folders are related to the document type, the Folder drop-down list will contain only those folders in which the document may be placed.
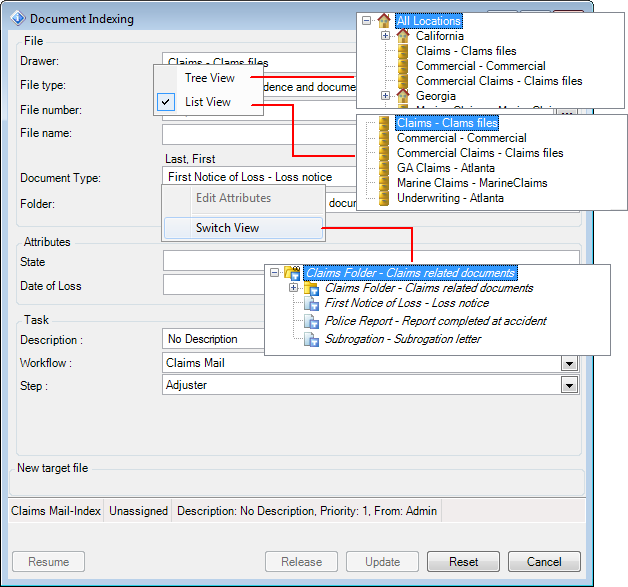
You can change the appearance of the lists in the File pane, that is the drawer (location) and file type lists and the folder and document lists.
- To switch the view types, right-click the appropriate list and select the view style that you want.
If your organization associates attributes with the document or folder level, you can edit the attributes by following the next steps. For information regrading which attributes should or must be updated, contact your ImageRight system administrator to discuss the workflow requirements.
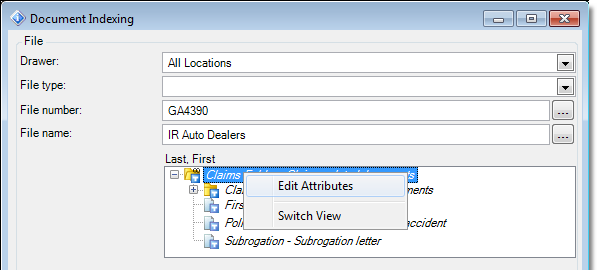
- As explained earlier, switch the document and folder view to a hierarchical tree view.
- Right-click the folder or document level as appropriate, and then click Edit Attributes.
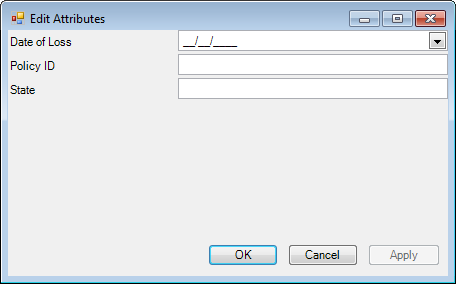
- Enter the attribute changes in the Edit Attributes dialog box.
- Click OK to save your changes and return. Click Apply to save your changes and retain the dialog box for further use. Click Cancel first to dismiss the dialog box without saving your changes.
