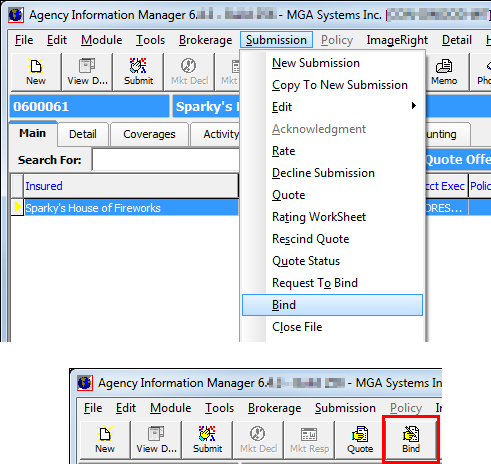
The Bind menu command is used to bind a quote and provide a confirmation of coverage to the retail agent/broker.
- Select a quote to bind on the Main tab.
- On the Submission menu, click Bind, or click the Bind button on the tool bar.
|
If a product message has been added to the product table in Data Maintenance Utility (DMU) for the product being quoted, the message will be displayed when you click Bind. |
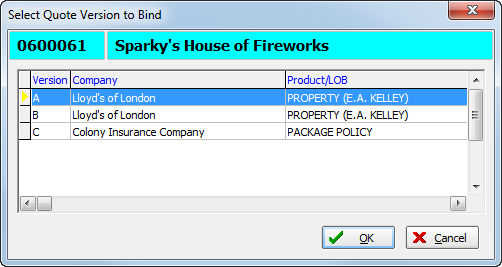
- If there are multiple versions of the quote, and if version A was selected on the Versions tab, then the Select Quote Version to Bind dialog box will appear. Select a quote version to bind and click OK.
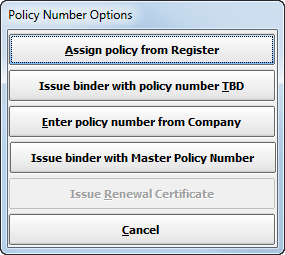
- In Policy
Number Options, click one of the following buttons:
- Assign policy from Register – assign an available policy number from the policy register
- Issue binder with policy number TBD – issue the binder with the policy number to be determined (TBD) at a later time
- Enter policy number from Company – type the company issued policy number in Enter Policy Number
- Issue binder with Master Policy Number – assign a master policy number to multiple submissions
- Issue Renewal Certificate – for renewal policies only, type the policy number in Enter Policy Number
- Cancel – cancel binding
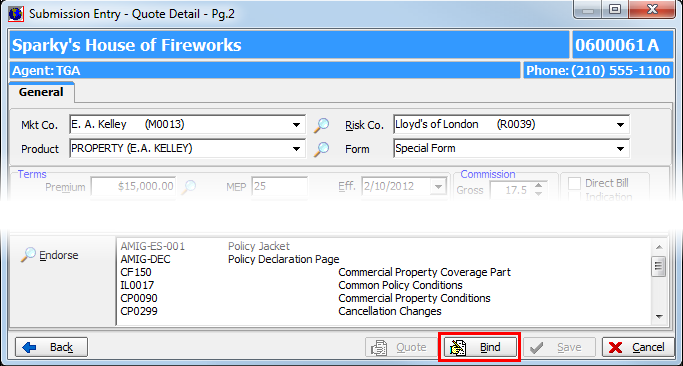
- Once you have entered a policy number or specified the policy number as TBD, Submission Entry – Quote Detail – Pg. 2 is displayed. Edit or review as necessary.
- Click the Bind button to enter binder information in Issue Binder.
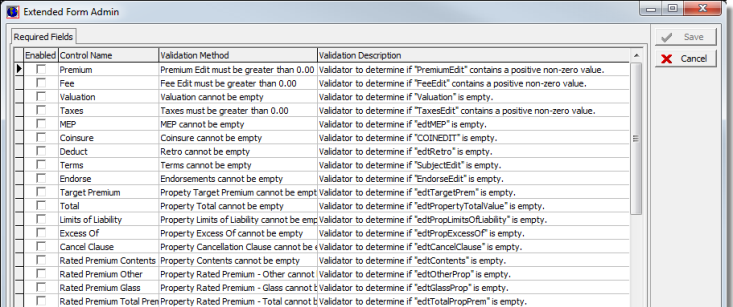
If you have a permission level of 9, you will see the Admin button on the title bar of the Submission Entry – Quote Detail – Pg. 2 dialog box. This button is used to specify which fields are required in the submission entry workflow.

- In the Extended Form Admin dialog box, select the fields to set as required fields, and then click Save.
We continue our discussion of binding a quote in the topics listed below.