Configure Commercial Submissions
Vertafore’s Commercial Submissions solutions streamlines the quoting workflow and forms workflow by offering real-time connectivity between agencies and carriers.
NOTE: You must first be granted access to the platform by the Vertafore team. Please reach out to your Vertafore Account Manager if you do not have access.
There are 6 main steps to getting up and running with Commercial Submissions:
-
Add Commercial Submissions product access to yourself
-
Add users
-
Configure your agency hierarchy
-
Connect to your management system (if applicable)
-
Add your appointed carriers
-
Add agency & producer quoting codes to Credential Manager
These steps must be completed before you can use the platform. If you run into issues during setup, please reach out to the Vertafore team!
1. Add Commercial Submissions Product Access to Yourself
NOTE: If you are new to VSSO, read this page before beginning, or reach out to the Vertafore team for assistance.
Commercial Submissions uses Vertafore Single Sign-On to allow for easy access to your Vertafore products. First, have your agency admin navigate to VSSO Customer Admin.
-
Select yourself from the right bar
-
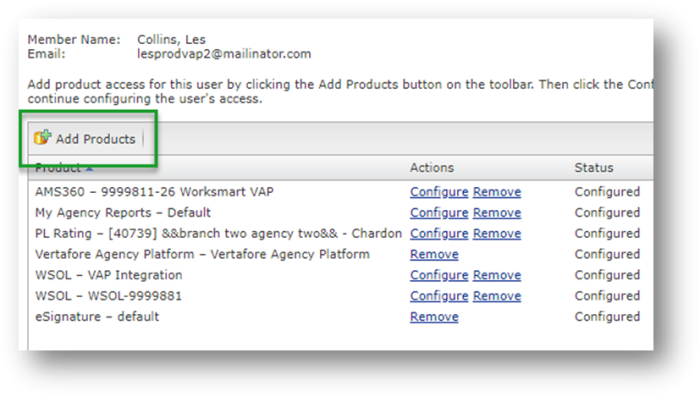
Under the 'Product Access' tab, select Add Products
-
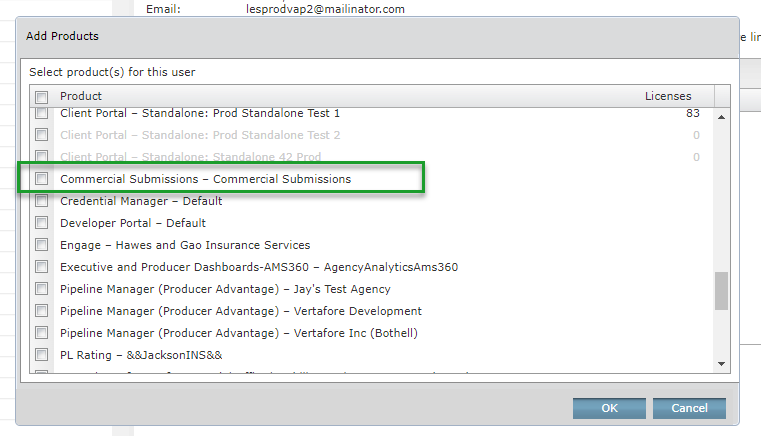
In the dialog box, select Commercial Submissions and click OK. If Commercial Submissions does not appear, reach out to the Vertafore team.
-
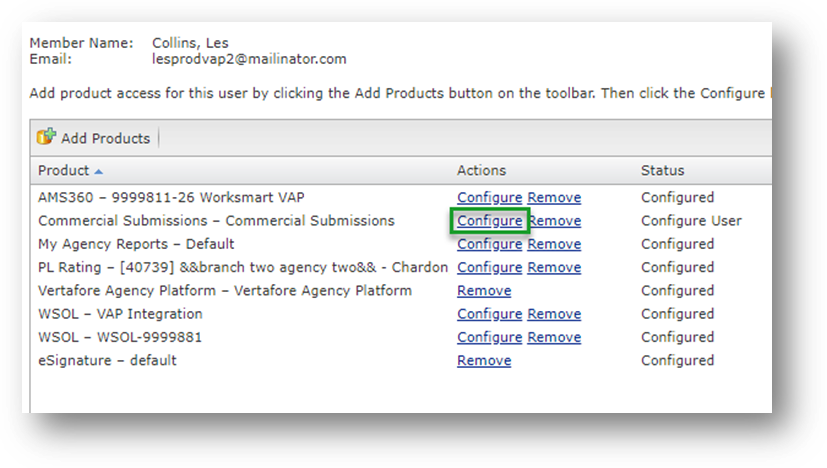
Next you will configure the Commercial Submissions access for yourself. Select the Configure button next to the Commercial Submissions product.
-
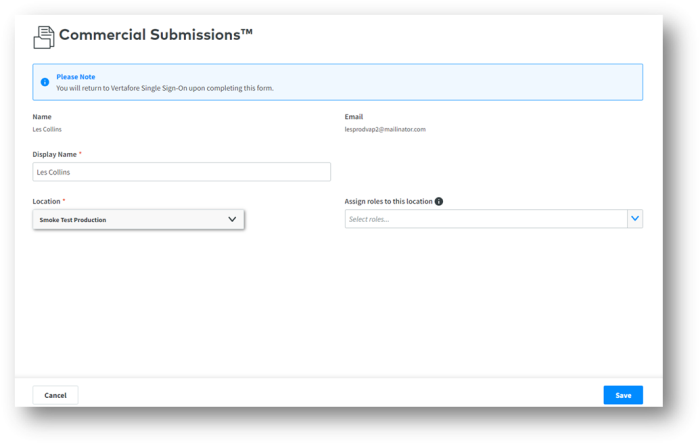
You will be taken to a page to configure your Display Name, Location, and Roles.
-
Display Name: How you would like your name to appear in Commercial Submissions. Most users opt to use their first and last name or just their first name.
-
Location: Your agency hierarchy. There will likely only be one location and ‘Office 1’ under this drop-down if you are brand new to Commercial Submissions.
-
Assign roles to this location: Allows you to configure your permissions for this location. As an admin, you should assign the below roles to yourself:
-
Super Admin - Allows you to update the admin section of the platform (VSSO admins may have this permission by default).
-
Submissions – Allows you to create and submit quotes.
-
You have now granted yourself access to Commercial Submissions! To log into the platform, navigate to https://solutions.apps.vertafore.com and enter your VSSO credentials.
2. Grant Access to Your Users
A similar process can be done in VSSO Customer Admin to grant access to other users (Add Product -> Configure -> assign Roles at each location).
NOTE: Most agencies opt to only assign the Submissions role to most users. This role will grant the user the ability to create quotes and submissions. If you would like a user to also see all quotes and submissions created within an office, assign the CS Manager role.
After granting access to the platform, users should navigate to https://solutions.apps.vertafore.com and enter their VSSO credentials to confirm they can log in properly.
3. Configure Your Agency Hierarchy
The next step is to configure the branches and locations of your agency.
NOTE: Commercial Submissions does not inherit agency hierarchy from other management systems, so this will have to be manually done upon setup.
-
Navigate to Commercial Submissions and log in. https://solutions.apps.vertafore.com
-
Click the My Account icon in the top right.
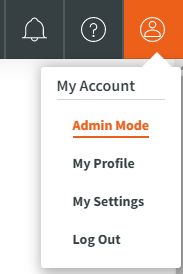
-
Select Admin Mode.
-
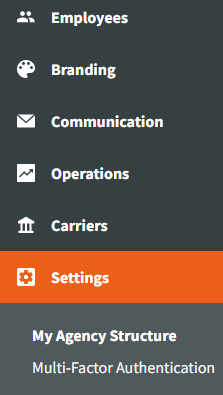
Select Settings on the left navigation bar.
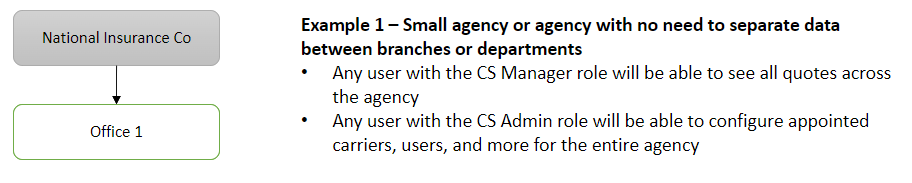
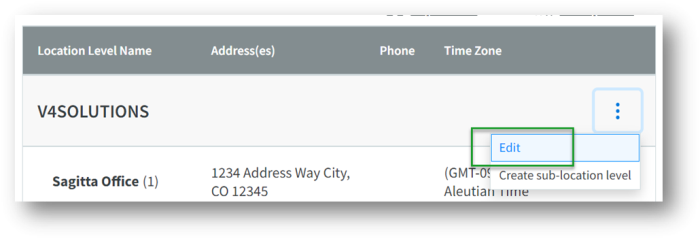
By default, every agency will start with a parent entity (i.e. National Insurance Co) and a sub-branch referred to as 'Office 1'. On this page, you can either select Edit to update Office 1, or you can select Create a New Location Level.
If you have a need to separate what data is visible between locations, departments, or branches, we recommend setting up multiple Offices.
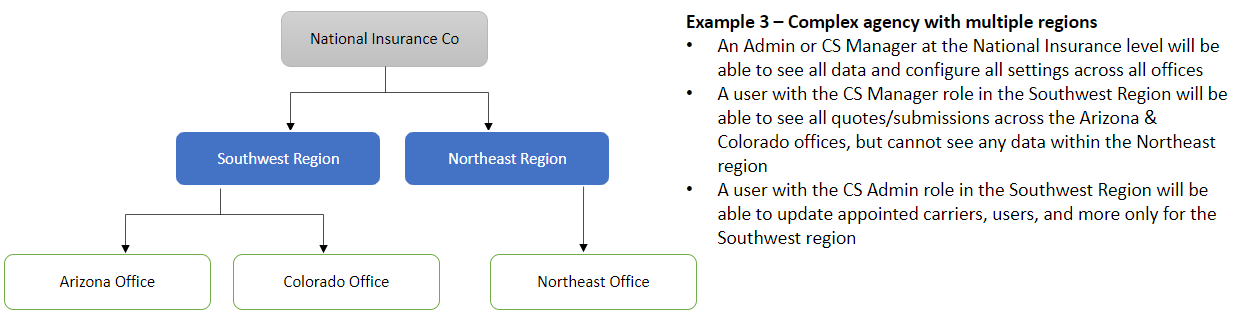
Examples of agency hierarchies:

For more information on agency hierarchies, please see the article on Settings & My Agency Hierarchy.
4. Connect to Your Management System (if applicable)
Now that you’ve configured your agency hierarchy, you can add management system info to allow customer and policy data to fill into Commercial Submissions.
-
Confirm that you are still on the Settings page where you just configured agency hierarchy (Admin Mode -> Settings)
-
Select the blue ellipsis on the right side of the screen for the location you’d like to connect to your management system. In the example below, the parent entity of V4SOLUTIONS was selected.
-
Scroll down the page until you see the AMS360 & Sagitta buttons
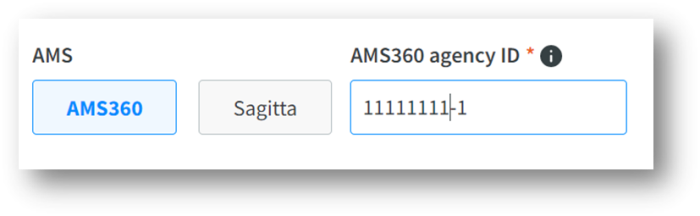
-
Select the appropriate management system. Enter the accompanying database ID, or web services info, to connect your management system to Commercial Submissions.
Once complete, Commercial Submissions is now connected to your management system database! You will be prompted to select the appropriate AMS customer when creating a new quote or submission.
NOTE: Management system access cascades downwards. You will only need to put one AMS360 ID at the agency level (i.e. National Insurance Co) if you would like both child offices to be prefill from the same AMS database.
NOTE: There is leeway to configure a very complex data prefill integration from multiple sources. For example, child office #1 could be configured to prefill data from an AMS360 database, child office #2 could prefill from a Sagitta database, and child office #3 office could prefill data from an entirely separate AMS360 database.
5. Add Your Appointed Carriers
You can now add your list of agency-appointed carriers. These will appear in two places in Commercial Submissions:
-
If the selected carrier is enabled for digital quoting, it will automatically appear in the Create Quote workflow.
-
All appointed carriers will appear in the Create Submission workflow.
-
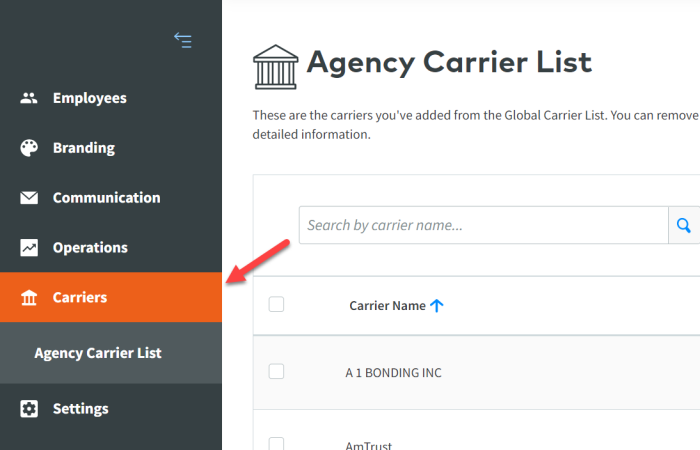
Log into Commercial Submissions and navigate to the Carriers page (Admin Mode -> Carriers).
-
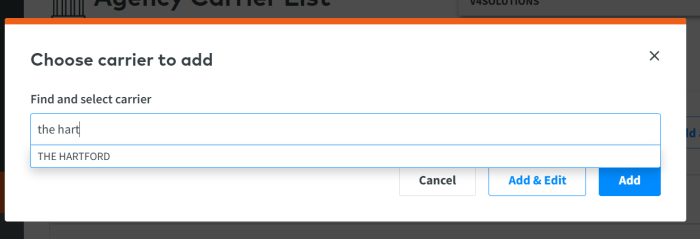
Select the Add a Carrier button on the right side of the page.
-
Type the carrier name and select the that appropriate option.
Complete the above steps for whichever carriers you’d like to add. Once all appointed carriers have been added, it’s time to add your quoting credentials.
NOTE: Remember to look at our Carrier Availability page to see which carriers & LOBs are currently live on Commercial Submissions!
6. Add Agency and Producer Quoting Codes to Credential Manager
The most important element of instant quoting is ensuring you have the correct agency code loaded into the platform. Vertafore’s carrier partners use this agency or producer code as a unique identifier to know exactly who is sending a quote request into their portal. To ensure you have the right carrier quoting code, either reach out to your carrier account manager or review our Help page on Quoting Codes.
Once you have the correct codes ready, complete the below steps:
-
Ensure you are logged into Commercial Submissions and click the My Account icon in the top right.
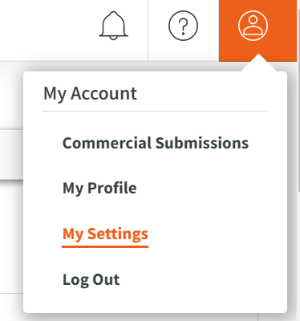
-
Select My Settings.
-
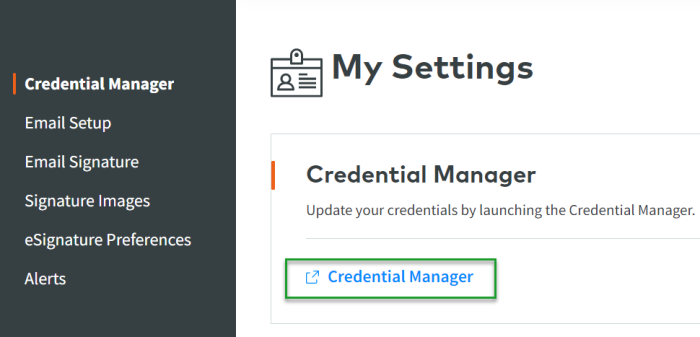
Select Credential Manager.
NOTE: If you are unable to update credentials, you will need to log into VSSO. In VSSO, configure the Credential Manager product and grant yourself the ability to add quoting codes.
-
Once in Credential Manager, complete the below steps:
-
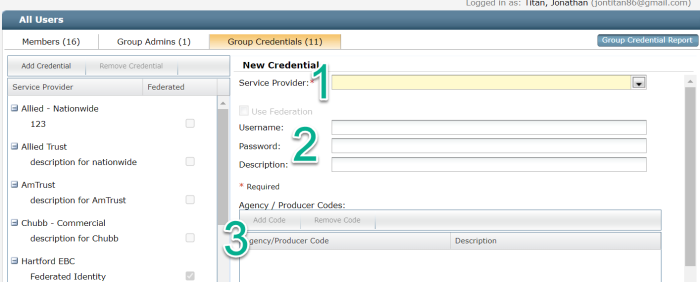
Search for the appropriate carrier with the Service Provider drop-down. (#1)
-
The system may prompt you to enter Username, Password and Description. (#2) NOTE: This info is generally not needed for Commercial Submissions, so mock data can be entered if needed.
-
Click the Add Code button and enter your agency or producer quoting code. (#3)
-
If you add the code at the group level (for example, adding code 01234 to the group named “Travelers”), then you can simply assign users to this group in the future for ease in onboarding new employees. For more in-depth information on Credential Manager, click here.
You’re ready to quote!
You have now completed the six main steps to configure a Commercial Submissions instance. Make sure to circulate the site URL with whoever will be using the platform at your agency https://solutions.apps.vertafore.com.
Vertafore will be adding new carriers and LOBs monthly, so be sure to keep a close eye on our Carrier Availability page. If you run into any issues, be sure to reach out to our supporting teams for assistance.