Image Viewer Explained
In other topics, you have seen the power and ease with which you can open and access files in ImageRight Desktop, navigate files, process tasks, add annotations, and more. Now it is time to learn more about Image Viewer and the functionality that you can use to make using Desktop and completing your work easier.

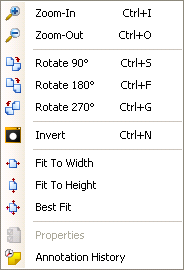
When you right-click an image, a menu will be displayed. As with many of the ImageRight menu commands, you can select them on the menu, use the keyboard shortcuts shown, or click the corresponding toolbar buttons.
In the table that follows, we provide a description of the commands that you will find on the menu, the toolbar buttons other than those on the Annotation toolbar, and the keyboard shortcuts that you can use. The tooltip displayed when you point at a button will also help you determine the function of a toolbar button.
For information about the annotation tools, see Annotation Toolbar.
In addition to the functionality explained here, you may also manage e-mail messages as explained in Use E-Mail in the Image Viewer.
|
Command |
Use to |
|
|---|---|---|
|
|
Zoom In |
Enlarge an image |
|
Zoom Out |
Downsize an enlarged image |
|
|
Rotate 90° |
Rotate the image in 90° increments |
|
|
Rotate 180° |
Rotate the image in 180° increments |
|
|
Rotate 270° |
Rotate the image in 270° increments |
|
|
Invert (negative image) |
Convert the image to negative view (often used to view damage in a photo) |
|
|
Fit to Width |
Adjust the image to the width of the window |
|
|
Fit to Height |
Adjust the image to the height of the window |
|
|
Best Fit |
Adjust the image for the best overall fit (view all the image) |
|
|
Properties |
Reserved for future use |
|
|
Annotation |
Display the creation history of annotations |
|
|
Toolbar Buttons Keyboard Shortcuts |
|
|
|
Ctrl+Ctrl or Ctrl+M |
Toggle Full Screen |
Switch between full screen view and normal view |
|
|
View in New Window |
Open the image in a new instance of the Viewer (to compare pages, documents, etc.) |
|
|
Edit in External Application | Open a document that is in preview mode for editing in the default application |
|
|
Refresh |
Refresh the display of the image to show any changes |
|
|
Print Zoomed Area |
Print the current view of the image in the viewer (Enlarged portion of image prints if you zoom in.) |
|
|
Save |
Save annotations added to the image |
|
Ctrl+ |
Scroll Right |
Move the zoomed image one space to the right |
|
Ctrl+ |
Scroll Left |
Move the zoomed image one space to the left |
|
Ctrl+ |
Scroll Up |
Move the zoomed image one space up |
|
Ctrl+ |
Scroll Down |
Move the zoomed image one space down |
|
Ctrl+C |
Copy |
Copy selected text when viewing a text document |
|
Ctr+R or double-click |
Reset Image |
Reset a zoomed image to its original size |
|
Ctrl+Shift+S |
Rotate selected images 90° |
Rotate multiple images selected in the file information pane |
|
Ctrl+Shift+F |
Rotate selected images 180° |
Rotate multiple images selected in the file information pane |
|
Ctrl+Shift+G |
Rotate selected images 270° |
Rotate multiple images selected in the file information pane |
|
Ctrl+1 |
NA |
Open the first page of the item in preview mode |
|
Ctrl+2 |
NA |
Open item saved in its native format in read-only mode in the related program |
|
Ctrl+3 |
NA |
Open item saved in its native format in edit mode in the related program |
|
If you cannot see all
the buttons on the toolbar, you might find it helpful to change
the size of Image Viewer or click the arrow at the end of a toolbar
to display the hidden buttons. To change the size of the viewer,
point at a border until the pointer changes to |
You can also enlarge the image (zoom in) using your mouse. To enlarge the image, drag the mouse pointer over a section (draw a box around a section). When you release the mouse button, the section will be enlarged.
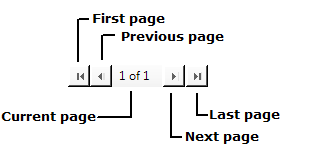
When you are viewing an image or PDF with multiple pages, you can use the Page toolbar to move through the pages. If you do not see the Page toolbar, click the arrow at the end of the Image toolbar. You change the page being viewed by clicking the arrows on the navigation control.
- To
go to the first or last page, click
 or
or  .
. - To
go to the previous or next page, click
 or
or  .
.
At some point, you may need to compare (side by side) two or more pages of a document or pages from multiple files. You can do that easily using the View in New Window toolbar button.
- View the first page that you want to compare.
- Click
 on the Viewer toolbar.
 - After the new instance of Image Viewer opens, return to Desktop and locate and select the second page you would like to compare. The second selected page will be displayed in the main instance of the viewer.
- Rearrange and resize the windows as needed.
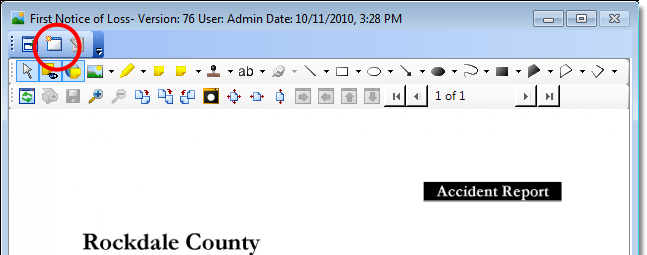
You can also use the View in New Window command on the View menu to compare items.
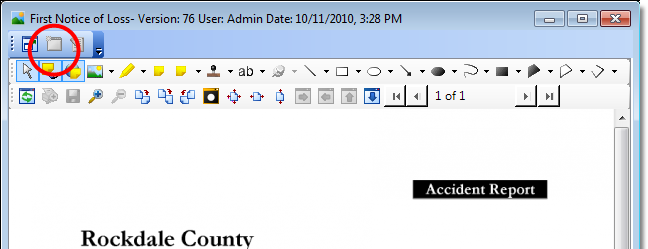
When you are ready to close the multiple instances of the viewer, close the secondary instance first and retain the main viewer. You can identify the secondary instance by size (unless you changed the size). The secondary instance is slightly smaller than the main instance. Also, the View in New Window button on the toolbar is unavailable.
You can change the secondary instance of the viewer (resize it, etc.) just as you can the main instance. You can even add annotations to images being viewed in a secondary instance of the viewer using the Annotation toolbar buttons.
|
If you close the main instance of the viewer by mistake, you can close and restart Desktop to restore the viewer or use the Layouts command. |
When you are viewing a file stored in its native format, the appearance of Image Viewer will change. You can open files in their native format, change them, and save the changes, all while working in Desktop, provided the native program is installed on the computer. You will find this helpful if you want to keep a working (changeable) copy of documents, spreadsheets, etc., in files.
When you see an icon representing the native program, click the appropriate link in Image Viewer or press the corresponding keyboard shortcut.
- Preview – Ctrl+1 – The first page of the selected item will be displayed in Image Viewer.
- Open (Read only) – Ctrl+2 – The file will be opened in the default program, but any changes you make cannot be saved in the original file.
- Edit (press Ctrl+3 or click
 ) – The file will be opened in the
program, and you can make changes. You will be prompted to save your changes
when you close the file.

You can open or preview the following protected document types by clicking Preview or Open:
- docm
- docx
- dotm
- dotx
- potm
- potx
- pptm
- pptx
- xlsm
- xlsx
- xltx
- xltm
If the document is password protected, you must provide the correct password to view or preview the document.
After editing PDF files in an external application such as Adobe, you can click Save in Adobe or just close the file. In both cases you will be prompted to save your changes in ImageRight Desktop. If a Save as dialog box appears (most likely when Protected Mode is turned on in Adobe), you should save the file in the opened location with the provided name. You will then be prompted to save your changes in ImageRight Desktop. If the Save as dialog box is empty or there is no initial location for the file (most likely to happen with Adobe DC), verify that the following two options are not selected in Adobe preferences:
- Show online storage when opening files
- Show online storage when saving files

Using the Viewer Options of Desktop
Settings, you can turn on the auto preview of certain file types. With
the preview turned on, the first page of the item selected in the file
tree will be displayed in the viewer in read-only mode automatically.
You can open the preview in the native program using Ctrl+2, Ctrl+3 or ![]() as explained earlier.
as explained earlier.
|
In order to preview or edit Microsoft Office 2007 files, Office 2007 or later must be installed on the computer being used. In order to edit PDF (Portable Document Format) files, you must have Adobe Acrobat installed. |
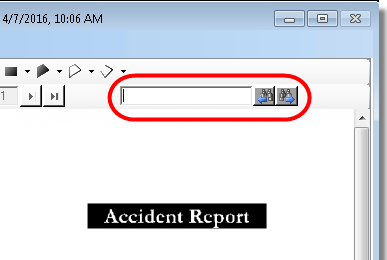
When you are viewing a PDF file, you can search for text in the PDF using the search box.
When you are viewing a Microsoft Outlook e-mail message, you might find the explanations of the sent date and received date helpful.
If the Outlook message was added to ImageRight using either ImageRight Printer or the Microsoft Outlook Add-In, the sent date is displayed. The sent date refers to the date and time the message was sent by the e-mail server.
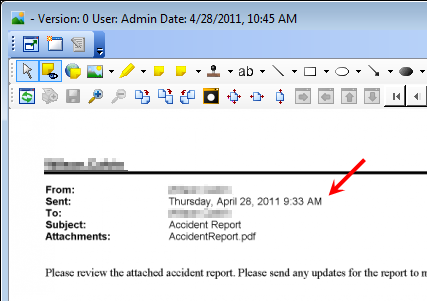
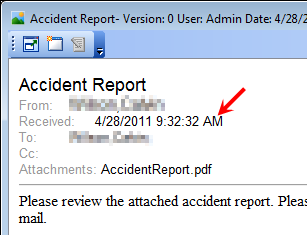
If the Outlook message was added to ImageRight using a drag-and-drop operation or imported using the Microsoft Outlook Interface, the received date and time will be displayed.
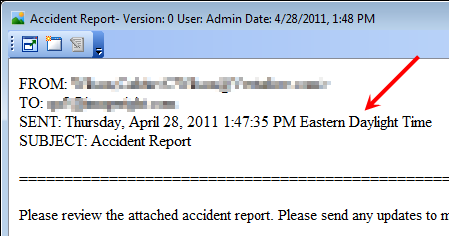
If the Outlook message was added to ImageRight by ImageRight E-Mail Receiver Service, that is, the message was processed by E-Mail Receiver Service, the sent date and time along with the time zone will be displayed. The date and time on the message represent the time zone on the computer where the E-Mail Receiver Service is installed.


 ,
then drag the viewer to the desired size.