You can locate files in Windows Explorer and import them directly into ImageRight Desktop using the Microsoft Add-In.
Before we explain how to import files, we are going to explain how to configure the settings that will dictate in what format the files will be imported when you use the Quick Import option.
|
The Windows Explorer Add-In cannot be used if you are using a Microsoft Windows 64-bit operating system. The explanation that follows is based on the use of Windows XP 32-bit. If you are using Windows 7 32-bit, you can adapt our steps as needed. |
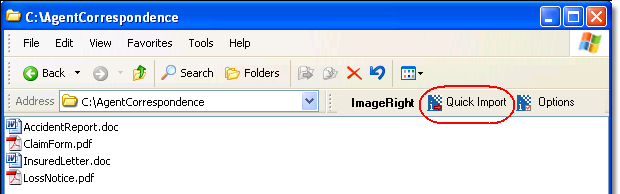
- Open Windows Explorer.
- Click
 on the ImageRight toolbar.
|
If you don't see the ImageRight toolbar, right-click the toolbar/menu area and click ImageRight on the menu. If the ImageRight toolbar is unavailable, open Internet Explorer, right-click the toolbar area, and then click ImageRight. You can now turn on the toolbar in Windows Explorer. |

- In the Options dialog box, you can configure the settings that determine the manner in which the files will be imported. The options you select will remain unchanged until you change them again.
- On the
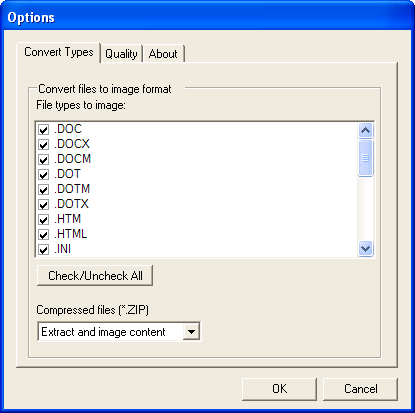
Convert Types tab, select the extensions in the File types to image list
that should be converted to an image. If an extension is not selected,
the file will be imported in its native format.
- .doc – Microsoft Word document
- .docx – Microsoft Word open XML format document
- .docm – Microsoft Word open XML format document with macros enabled
- .htm – Hypertext Markup Language
- .html – Hypertext Markup Language
- .ini – Initialization/configuration file
- .log – Log file
- .mdi – Microsoft Office Document Imaging file
- .ppt – Microsoft PowerPoint presentation
- .pptx – Microsoft PowerPoint open XML format presentation
- .pptm – Microsoft PowerPoint open XML format presentation with macros enabled
- .ppsx – Microsoft PowerPoint open XML format slide show presentation
- .ppsm – Microsoft PowerPoint open XML format slide show presentation with macros enabled
- .rtf – Rich text format
- .tif – Tagged Image File Format
- .tiff – Tagged Image File Format
- .txt – Text file
- .vsd – Microsoft Visio drawing
- .xls – Microsoft Excel workbook
- .xlsx – Microsoft Excel open XML format workbook
- .xlsm – Microsoft Excel open XML format workbook with macros enabled
- .xlsb – Microsoft Excel binary workbook
- .xml – Extensible Markup Language
- In the
Compressed Files (*.zip) list, select the manner in which you would like
compressed files to be processed (extracted).
- Do not extract content – The files will not be extracted. The file will be imported with the .zip extension.
- Extract and image content – The files will be extracted and converted based on the selections you make in the Convert files to image format list. If the compressed files contain images in a graphics format other than TIFF, JPEG for example, the original format will be retained.
- Extract but leave content in native format – The files will be extracted and imported in their native format.
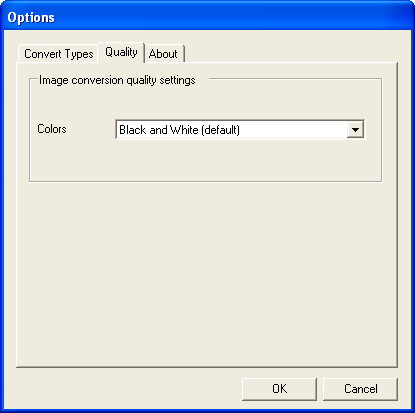
- On the Quality tab, you can select the color option that you would like applied to the files that are being imported as images: Black and White (TIFF format), Color (JPEG format), or Gray Scale.
- Click OK to save your changes.
With the options that you want to use selected, you are ready to continue the import process.
|
For more information about the Import dialog box discussed later, see Import Dialog Box Explained. |
- Start ImageRight Desktop.
- In Windows
Explorer, locate and select the file that you would like to import. You
may select multiple files using Shift+click or Ctrl+click.
- If you select multiple files, the page description on the imported items will be "Imported from Windows Explorer" unless you change the description as explained later.
- If you select only one file, the name of the file will be used as the page description unless you change the description as explained later.
- Click
 on the ImageRight toolbar.
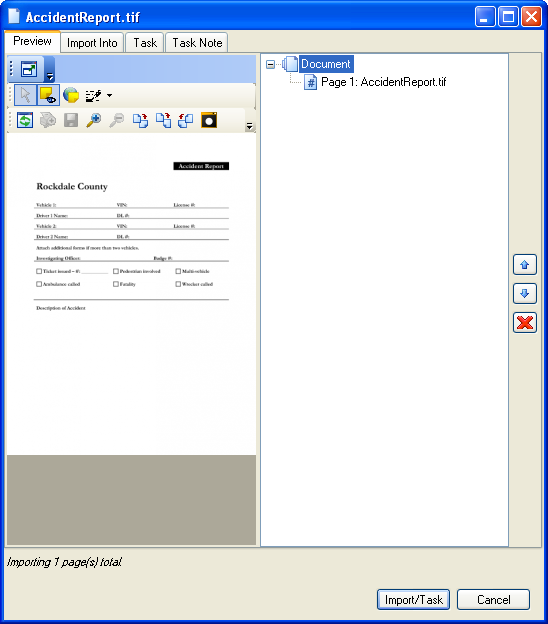
- When the Import dialog box opens, you are ready to configure the filing options to be applied.
- The items
that are being imported appear on the right side of the Preview tab. You
can:
- Change
the order of multiple items. Select the item to be moved and click
 (move up) or
  (move down) on the right side of the dialog box.
 - Select an item in the list and see a preview on the left side of the dialog box.
- Select
an item in the list and click
 to remove it from the list.
- Change
the order of multiple items. Select the item to be moved and click
- You can
redact an image before it is imported. Click
 to use
the redaction tool. For more information about redaction, see Redact Image. It is important to note that when you complete the import of
an image that you have redacted, a copy of the original image is not created.
Only the redacted image will be viewable in Desktop.
to use
the redaction tool. For more information about redaction, see Redact Image. It is important to note that when you complete the import of
an image that you have redacted, a copy of the original image is not created.
Only the redacted image will be viewable in Desktop.
- On the Import Into tab, you select the options related to the file structure, that is, the options that direct where the items will be filed.
- In the
File info pane, select the destination where you would like to place the
items.
- Current file and position
- Current file
- New file
- New temporary file
- Existing file
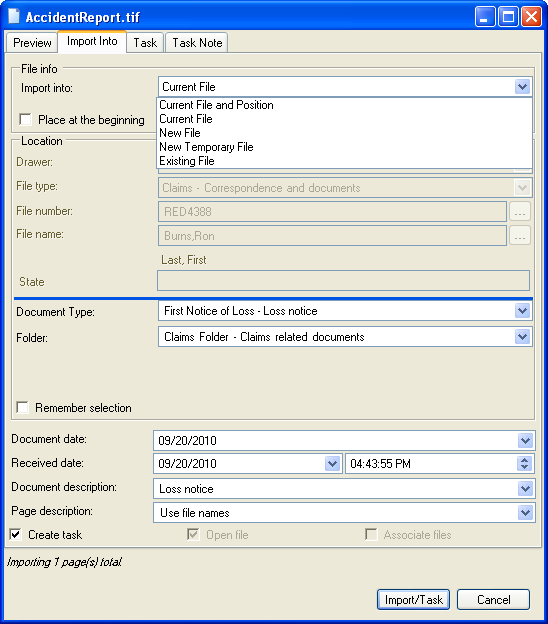
- With the Current file option selected, select Place at the beginning, and the item will be placed at the beginning of the file (the first document in the first folder).
- In the
Location pane, select the file structure related information that you
would like applied to the imported items.
- Drawer
- File type
- File number (File number is unavailable if New temporary file is selected.)
- File name (File name is unavailable if New temporary file is selected.)
- Document type
- Folder
- If you would like to change the document date on the items, enter the new date value in the Document date box. You can click the arrow and select the date from a calendar.
- If you
want to change the received date and time, enter the new date and time
values in the Received date boxes. Typically, the date and time are updated
to reflect the date and time e-mail messages were received.
- You can type the new date value or click the arrow and pick the date from a calendar.
- You can type a new time value or use the arrows to set the time.
|
If you have selected the option in Desktop Settings to split imported content into multiple documents, the document date and the received date cannot be changed when you are importing multiple documents. |
- As needed, you can enter a description in the Document description or Page description boxes. The entered descriptions will be displayed in Desktop, replacing the system generated descriptions. The display of the entered document description is optional and is turned on in File Tree Options.
-
Select the Split PDF documents option (not shown) and multipage PDF documents will be added as a document with multiple pages displayed in the file tree.
- Select the Create task option to create a task related to the item being imported. Selecting this option updates the same option on the Task tab. The workflow, etc., selected on the Task tab, as explained later, will dictate where the task is created.

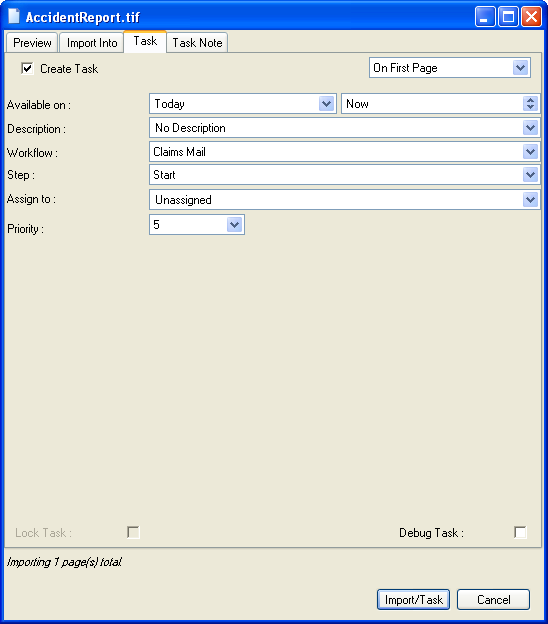
- On the Task tab, select the Create task option if you would like to create a task on the content being imported. Selecting this option updates the same option on the Import Into tab.
- Enter
the following information:
- On first page
- On the document
- Available on (date and time)
- Description
- Workflow
- Step
- Assign to
- Priority
- Lock task
- Debug task
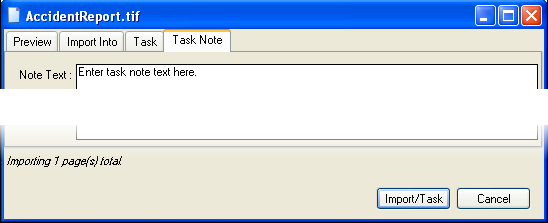
- On the Task Note tab, you can add an optional note to the task.
- Click Import (Import/Task) to complete the import process. Click Cancel to end the import process.