In this topic, we continue our discussion about managing Units At Risk on a submission.
The below sub-tabs are found under the Units at Risk > Auto tab.
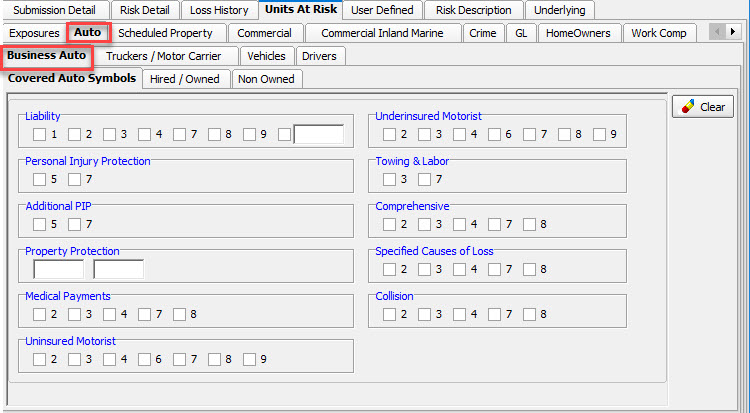
The Business Auto sub-tab (found under the Auto tab) was added as part of the AIM 19R3 release, and includes information for Covered Auto Symbols, Hired / Owned, and Non Owned.
All of the info under the Business Auto sub-tab adheres to the following rules:
- Selected symbols are available to be passed to VPI (Vertafore Policy Issuance).
- Selection of one or more symbols in each category is allowed.
- Empty boxes enable users to add a manually entered symbol.
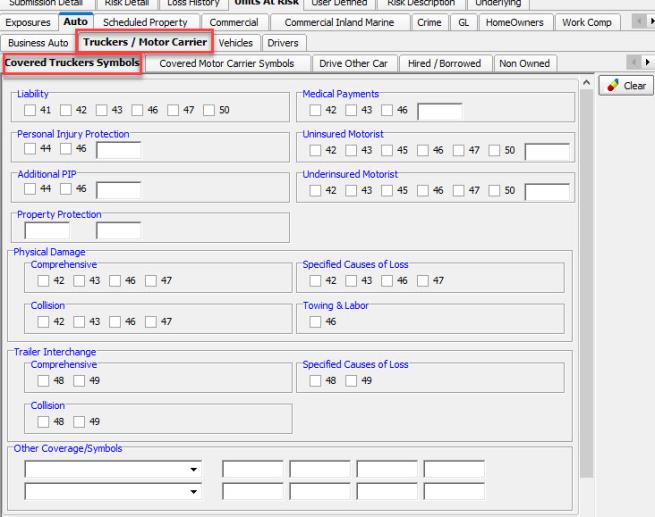
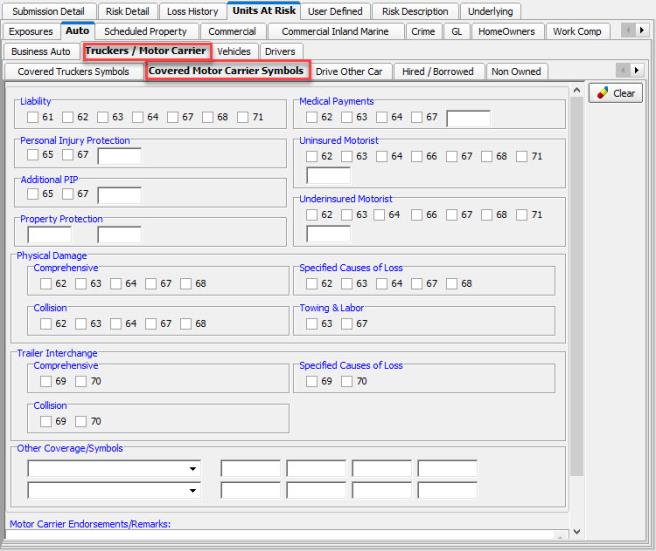
The Truckers / Motor Carrier sub-tab (found under the Auto tab) was added as part of the AIM 20R1 release, and includes information for Covered Truckers Symbols, Covered Motor Carrier Symbols, Drive Other Car, Hired / Borrowed, Non Owned, and Trailer Interchange.
The info under Covered Truckers Symbols and Covered Motor Carrier Symbols adheres to the following rules:
- Selected symbols are available to be passed to VPI (Vertafore Policy Issuance).
- Selection of one or more symbols in each category is allowed.
- Empty boxes enable users to add a manually entered symbol.
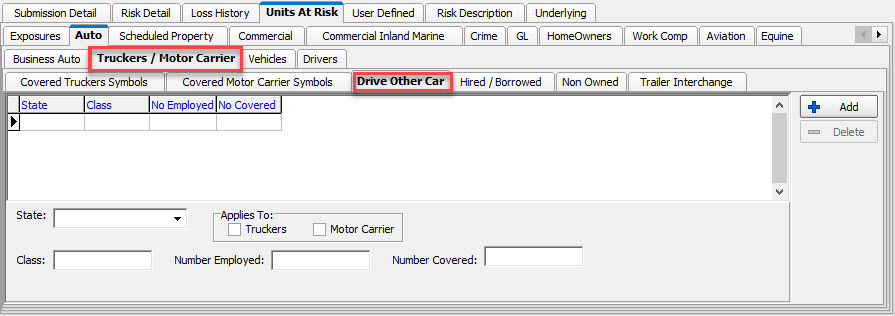
For Drive Other Car, enter the following information where applicable, and then click Add for all applicable states and/or coverages.
- State: Select the applicable state where Drive Other Car coverage applies.
- Applies To: Select which coverage is applicable (Truckers or Motor Carrier).
- Class Code: Enter a class code.
- Number of Employees: Enter Number of Employees.
- Covered Number: Enter Covered number.
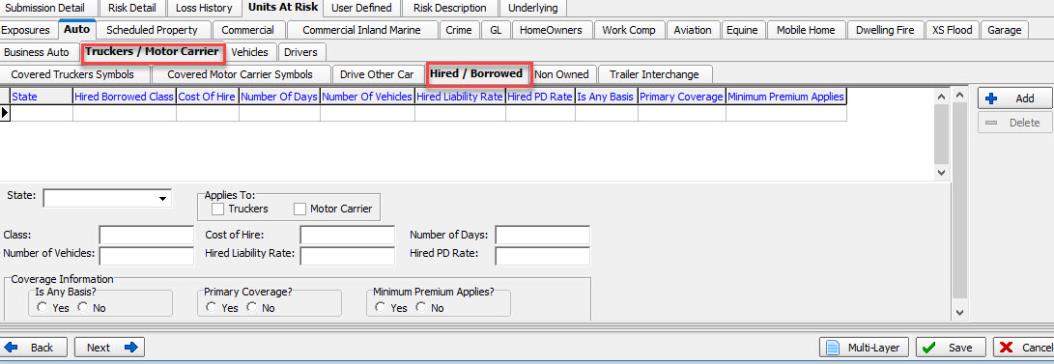
For Hired / Borrowed, enter the following information where applicable, and then click Add for all applicable states and/or coverages.
- State: Select the applicable state where Hired/Borrowed coverage applies.
- Applies To: Select which coverage is applicable (Truckers or Motor Carrier).
- Class: Enter a class code.
- Cost of Hire: Enter cost, if applicable.
- Number of Days: Enter valid number of days for coverage.
- Number of Vehicles: Enter valid number of vehicles.
- Hired Liability Rate: Enter valid rate.
- Hired PD Rate: Enter valid rate.
- Coverage Information
- Is Any Bases?: Select Yes or No.
- Primary Covearge?: Select Yes or No.
- Minimum Premium Applies?: Select Yes or No.
For Non Owned, enter the following information where applicable, and then click Add for all applicable states and/or coverages.
- State: Select the applicable state where Non Owned coverage applies.
- Applies To: Select which coverage is applicable (Truckers or Motor Carrier).
- Class: Enter a class code.
- Group Type: Select group type from list.
- Number Of: Enter valid number.
- Percent: Enter valid Percent.
- Coverage Information
- Social Service Agency?: Select Yes or No.
- Individual Liability?: Select Yes or No.

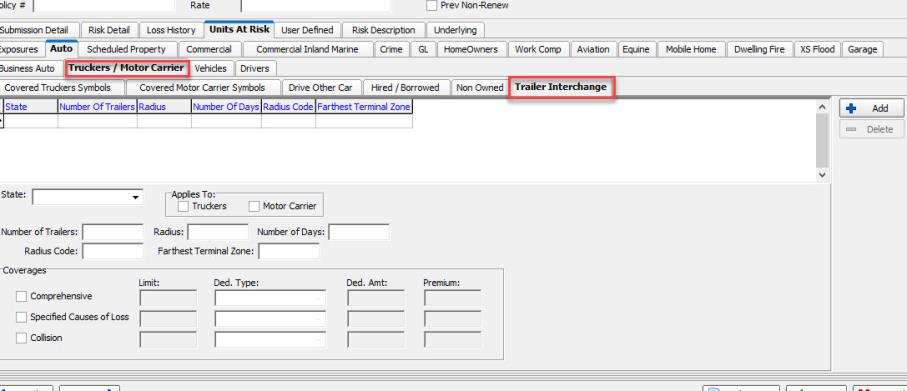
For Trailer Interchange, enter the following information where applicable, and then click Add for all applicable states and/or coverages.
- State: Select the applicable state where Trailer Interchange coverage applies.
- Applies To: Select which coverage is applicable (Truckers or Motor Carrier).
- Number of Trailers: Enter the number of trailers applicable.
- Radius: Enter the valid radius.
- Number of Days: Enter the applicable number of days.
- Radius Code: Enter applicable radius code.
- Farthest Terminal Zone: Enter the applicable zone.
- Coverages: Enter values for the applicable coverages.
- Select the coverage applicable and enter the limit, deductible type, deductible amount and premium for each coverage.
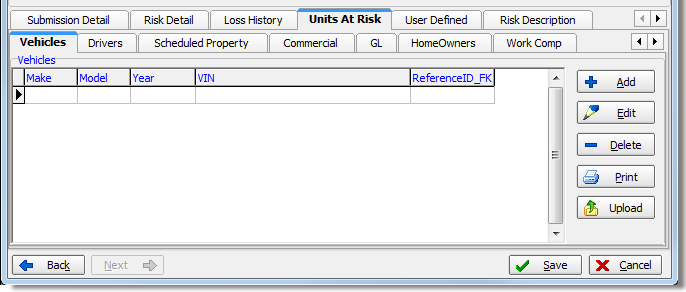
Using the Units at Risk Vehicles sub-tab (found under the Auto tab), you can list specific information about vehicles that are covered on the policy or submission.
In the following table, we discuss each of the buttons on the Vehicles tab and their functions.
|
Button |
Function |
|---|---|
|
|
Add a new vehicle record |
|
|
Edit the selected vehicle record |
|
|
Delete the selected vehicle record |
|
|
Print the list of vehicles |

|
Upload CSV or XLSX files from Microsoft Excel(See Upload Vehicle Spreadsheet) |
In the following steps we will show you how to add a vehicle to the list. With practice, you will be able to modify our steps to edit existing vehicle records as needed.
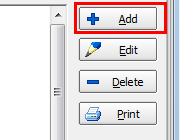
- Click the Add button to add a vehicle to the policy.
- On the tabs listed below, enter information about the vehicle.
On the Units at Risk Drivers sub-tab (found under the Auto tab), you can list drivers that will be covered on the policy. Specific information can be added for each driver.
In the table that follows, we show each of the buttons available on the Drivers tab and its purpose.
|
Button |
Function |
|---|---|
|
|
Add a new driver |
|
|
Edit the selected driver |
|
|
Delete the selected driver |
|
|
Print a list of drivers |

|
Upload Driver Spreadsheet in Mircosoft Excel CSV or XLSX format |
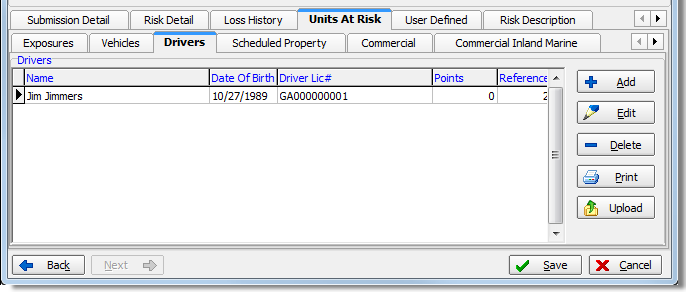
In the topics listed below, we show you how to add a new driver to a policy. You can modify these steps to edit existing drivers as needed.


