
| This feature, or some fields and options described, might not be available depending on your settings, security rights, or platform package. |
The Receipt form allows you to enter money received from various sources and apply those monies to the appropriate general ledger accounts. Receipts, which are posted individually in the centers, are then gathered into a deposit in the Bank Center and are sorted and posted by individual bank account.
The Bank Center can be used to receipt payments received from various payee types. To enter receipts from the Bank Center, do the following:
In the Bank Center open the bank account where the receipts are to be deposited.
Select New Receipt from the Actions menu. The Receipt form displays.
Follow the steps below based on the bank account type (Trust or Operating) and the Received From type.
If the bank account is designated as a Trust account in Bank Setup the default Received From is Insured.
Tab to the Name field and enter a few letters of the name then [Enter] to open the Customer Search form or click the Search link.
Search for and highlight the desired account. [Enter] or click Select to close the Customer Search form and return to the Receipt form with the Insured Accounts Receivable voucher section expanded.
The receipt type defaults as Check. Select another type, if appropriate.
For Check receipts, tab to the Bank # and enter the bank routing number (optional) and then tab to the Check # field and enter the customer's check number.
Bank # and Check # fields are unavailable if the receipt type is other than Check.
Tab again to move to the Description field. For checks, the Description defaults as Check Payment - [Check #]. This description defaults into certain of the voucher sections but is always available to be changed.
Tab to the Amount field and enter the total amount of the receipt.
Open the voucher section representing where in the general ledger the non-bank portion of the check should be recorded. Available voucher types when Received From = Insured are:
You can enter a receipt for invoices in different divisions. To do this several setups and criteria must be met. See Workflow: Setting Up and Using Interdivision Accounting for Customer and Broker Cash Receipts for more information.
The default option is Non-Zero Balance Items Only. All open invoices for the selected insured display in the grid, regardless whether the invoices are brokered or non-brokered.
Check the Auto Fill box to plug the Invoice Balance into the Amount column. A default description is also entered. Type in the amount or description fields to override the Auto Fill entries, if desired.
![]()
Invoice rows displaying in the grid as 'grayed out' are disabled because they do not match the division selected in the General Information section.
If the invoice contains a late charge that you wish to waive or the receipt amount is slightly less than the full amount due, highlight the invoice row and click Edit on the section menu and complete the following fields. When complete, click Update on the section menu.
|
Fields |
What is this? |
|
Amount |
Enter the amount of money to be applied. |
|
Description |
Enter a description for the transaction. This field pre-fills with default descriptions , based on the Receipt Type selected in the Receipt Information section. This can be changed, if desired. |
|
Waive |
If you wish to waive a late charge or small balance, you must select the voucher, and click Edit. Then, check the Late Charge for this Invoice and/or the Small Balance for this Invoice checkbox, as appropriate. Late Charge for this Invoice
Small Balance for this InvoiceThe amount displayed in the Small Balance for this Invoice field calculates based on the invoice balance, minus the receipt amount and the late charges, if they exist.
|
To apply a receipt against a closed invoice (one with a zero balance), select the All Invoices Since option, and enter a specific as of date. Click Get Data and AMS360 returns all invoices for the insured from the selected date to the current system date.
Enter the receipts to the appropriate invoices in the type-in-grid.
Invoice rows displaying in the grid as 'grayed out' are disabled because they do not match the division selected in the General Information section.
To apply money on account, click the Add on Account link. Complete the following fields and click Add on the section menu.
These monies post to GL account #11211 (Insured Accounts Receivable).
|
Fields |
What is this? |
|
Amount |
Enter the Amount of money to apply on account. |
|
Description |
Enter a Description for the on account transaction. This field pre-fills with default descriptions, based on the Receipt Type selected in the Receipt Information section. This can be changed, if desired. |
|
Policy |
You can apply money at the customer account level by leaving the Policy field blank. Or, apply the money to a customer at the policy level, by selecting a policy from the list. If a policy is selected in error, select the Policy field and click the Delete key on your keyboard. |
Use the Direct Bill Deposit section to enter a receipt from an insured for monies received for a direct bill policy or application. These monies are posted to general ledger account #21121-DB Deposits Payable Ins. Co. or #21122-DB Deposits Payable Brokerage Co. and then are paid out, in the same amount as receipted (no deduction for commissions) to the company using the Direct Bill Deposit section of the Check form.
Click New on the section menu and complete the following fields, as appropriate:
|
Fields |
What is this? |
|
Amount |
Enter the Amount of the Direct Bill Deposit receipt. |
|
Description |
Defaults from the Receipt Information section but can be changed. This description posts to the 21121 or 21122 general ledger account and can be important when matching receipt transactions to corresponding check transactions. Information identifying the specific payment, such as due date or policy #/type can be helpful here. |
|
[Company] |
Select the company from the appropriate list matching the company to which payment is to be forwarded. If the receipt is reimbursing the agency for a payment already sent, select the company that was previously paid. Only one insurance/brokerage or finance company can be selected. |
When posting a receipt for a customer to the Direct Bill Deposit section of the Receipts form you receive the following message:
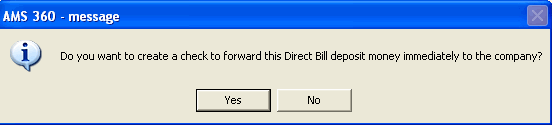
Click Yes to open the Direct Bill Deposit Check form for the company selected in the receipt.
The amount of the receipt defaults into the General Information and the voucher section of the check.
Post and Print the check, as normal.
Click No on this message if you do not wish to immediately create the check to the company for this receipt. See Checks for information about issuing a check outside of the Receipt workflow.
The Other GL Accounts section is available to apply monies received to general ledger accounts that are not available through other receipt voucher sections.
|
Fields |
What is this? |
|||||
|
GL # |
Select the GL # you wish to apply the money to. |
|||||
|
Amount |
Enter the Amount to apply. This field defaults to the amount Remaining to Apply found in the Receipt Information section. This can be changed. |
|||||
|
Description |
Enter a Description for the transaction. A default description pulls to the field, based on the Receipt Type in the Receipt Information section. This can be changed. |
|||||
|
Division |
Division assigned to the selected bank. This cannot be changed. |
|||||
|
GL Department |
Choose the appropriate GL Department for your transaction.
|
|||||
|
1099 |
If this is a 1099 expense reimbursement, select the appropriate 1099 Category and Type. If this is not a 1099 reimbursement transaction, delete the Category and Type information, if necessary. Questions as to whether this is a qualified 1099 expense should be directed to your agency accountant.
|
|||||
|
GL # Required Fields |
The GL # Required Fields drop-down lists are subledger entities (customer, broker, insurance company brokerage company, etc.). Depending upon the GL # selected, the account may require a subledger entity be chosen. If the account is subledgered, its subledger entity is active. |
When voucher data entry is complete, click Post and New to activate another blank receipt form, if entering a group of receipts, click Post to complete the check and close the form or Post and Print to post the receipt and immediately print a receipt for the customer.
ALT+F; N for Post and New.
ALT+F; P for Post.
ALT+F; R for Post and Print.
If the bank account is designated as a Trust account in Bank Setup the default Received From is Insured and the cursor focus is on the Name field. To select a different Received From option, click the arrow on the Received From list (or hold down the Shift key then press the Tab key once).
Selecting a Received From type, other than Insured, populates the Name list with active selections of that type. Drop-down the list to make a selection (you can also type the first letter of the name to load the first selection in the list beginning with that letter).
Tab out of the Name field to load the receipt voucher types available for the Received From type selected.
The receipt type defaults as Check. Select another type, if appropriate.
For Check receipts, tab to the Bank # and enter the bank routing number (optional) and then tab to the Check # field and enter the customer's check number. Bank # and Check # fields are unavailable if the receipt type is other than Check.
Tab again to move to the Description field. For checks, the Description defaults as Check Payment - [Check #]. This description defaults into some voucher sections but is always available for change.
Tab to the Amount field and enter the total amount of the receipt.
Open the voucher section representing where in the general ledger the non-bank portion of the check should be recorded. See Section Descriptions later in this topic for details about data entry for each voucher type.
When voucher data entry is complete, click Post and New to activate another blank receipt form, if entering a group of receipts, click Post to complete the check and close the form or Post and Print to post the receipt and immediately print a receipt for the customer.
ALT+F; N for Post and New.
ALT+F; P for Post.
ALT+F; R for Post and Print.
If the bank account is designated as an Operating account in Bank Setup the form opens with cursor focus on the Received From field. Type the first letter of the appropriate Received From type (if more than one option begins with the same letter use the down arrow on the keyboard to scroll through available choices):
Broker
Brokerage Company
Employee
Fee Company
Finance Company
Insurance Company
Insured
Insured - DB Deposit
Other (for one-time deposits of receipts from payees not entered in AMS360)
Vendor
Selecting a Received From type, other than Insured, populates the Name list with active selections of that type. Drop-down the list to make a selection (you can also type the first letter of the name to load the first selection in the list beginning with that letter).
Tab out of the Name field to load the receipt voucher types available for the Received From type selected.
The receipt type defaults as Check. Select another type, if appropriate.
For Check receipts, tab to the Bank # and enter the bank routing number (optional) and then tab to the Check # field and enter the customer's check number. Bank # and Check # fields are unavailable if the receipt type is other than Check.
Tab again to move to the Description field. For checks, the Description defaults as Check Payment - [Check #]. This description defaults into some voucher sections but is always available to be changed.
Tab to the Amount field and enter the total amount of the receipt.
Open the voucher section representing where in the general ledger the non-bank portion of the check should be recorded. See Section Descriptions later in this topic for details about data entry for each voucher type.
When voucher data entry is complete, click Post and New to activate another blank receipt form, if entering a group of receipts, click Post to complete the check and close the form or Post and Print to post the receipt and immediately print a receipt for the customer.
ALT+F; N for Post and New.
ALT+F; P for Post.
ALT+F; R for Post and Print.
To give you the broadest possible options, the Receipt form can be accessed from many places throughout AMS360. Where you are when you access a receipt form controls what voucher sections display and what choices you have about where the receipt posts in the general ledger.
Depending on which center you are working in when you decide a receipt should be entered, you may be able to generate the appropriate receipt without opening the Bank Center.
Following are examples of types of receipts and the system location where they are commonly created:
If you have security to access the Bank Center, receipts of all types can be entered there. See the Bank Center Receipts section earlier in this topic for more information. Security access allows you to restrict posting or voiding a receipt to a past date. For more information see Security Group Setup.
|
If the payor is... |
and the payment is for... |
access the receipt form from the... |
|
Agency & Broker's Customers |
Agency Bill Invoices |
Customer Center
Customer Register
|
|
Direct Bill applications and payments for existing direct bill policies. |
||
|
Any other receipts for Customer Accounts Receivable items. |
||
|
Broker |
Payments received from a broker made on behalf of their Customer. |
Open the broker in the Broker Center. Click Action > New Receipt on the center menu bar. The Receipt for Broker form displays. Depending upon the payment type, select one of the sections below:
You can now receipt a broker's direct bill payment to more than one customer. |
|
Direct Bill applications and payments for existing direct bill policies. |
||
|
Any other payments received from brokers for Miscellaneous reasons, such as reimbursement of membership fees, etc. |
||
|
Finance Company |
Payment received from finance companies for Broker's Accounts Receivable. |
Open the finance company in the Company Center. Click Action > New Receipt on the center menu bar. The Receipt for Company form displays. Depending upon the payment type, select one of the sections below:
You can now receipt a broker's direct bill payment to more than one customer. |
|
Payments received from finance companies for Finance Company Receivables |
||
|
Direct Bill applications and payments for existing direct bill policies. |
||
|
Insurance & Brokerage Company Agency Bill & Direct Bill |
Net Return Premium payments received from companies on agency bill invoices or statements. |
Open the insurance or brokerage company in the Company Center. Click Action > New Receipt on the center menu bar. The Receipt for Company form displays. Depending upon the payment type, select one of the sections below:
You can now receipt a brokerage or insurance company's direct bill payment to more than one insured. |
|
Direct Bill applications and payments for existing direct bill policies. |
||
|
Direct Bill Commissions received from insurance or brokerage companies. |
||
|
Contingency or Performance Bonus payments received from companies. |
||
|
Any Other payment received. |
||
|
Fee Companies |
Payments received from Fee Companies for returned fees. |
Open the Fee company in the Company Center. Click Action > New Receipt on the center menu bar. The Receipt for Company form displays. Depending upon the payment type, select one of the sections below:
|
|
Employee |
Reimbursement payment received from Employees for salary, expense or commission advances. |
Open the Employee in the Employee Center. Click Action > New Receipt on the center menu bar. The Receipt for Employee form displays. Depending upon the payment type, select one of the sections below:
You can now receipt an employee direct bill payment to more than one insured. |
|
Direct Bill applications and payments for existing direct bill policies. |
||
|
Any Miscellaneous payment received from an employee. |
||
|
Vendor Center |
Refunds received from Vendors. |
|
To begin, enter the general information about the receipt (receipt date, amount, description, bank) in the Receipt Information section.
This portion of the transaction posts to the general ledger account number for the selected bank account.
|
Fields |
What is this? |
||||||||||||||
|
Date |
Using the Date Picker, enter or select the Date you want the receipt to post to the general ledger. The current system date defaults. Security access can restrict backdating a receipt. |
||||||||||||||
|
Bank |
Enter the bank you are receipting the money to. Depending on which center the receipt was accessed from, the Bank field defaults differently. The information displayed in this field includes the bank name, GL number and the division assigned to the bank. The banks available in the Bank list depend on your security authorizations.
|
||||||||||||||
|
Type |
Select the form of payment (check, cash, credit card, electronic transfer, or debit card). The default selection is Check. When the Type is check, enter the, and Check #, if desired. |
||||||||||||||
|
Received From |
Select the payor type from the list. This field selection controls the items available for selection in the Name field. |
||||||||||||||
|
Name |
Select the payor's Name from the list. The list is populated based on the Received From field selection.
|
||||||||||||||
|
Bank # |
Available for entry if the Type of payment is a Check. Enter the Bank #, if desired. |
||||||||||||||
|
Check # |
Available only for payments received in the form of checks. This entry is appended to the Description field and is available for viewing and reporting. |
||||||||||||||
|
Description |
Enter a Description for the receipt. Based on the Receipt From type selected, default descriptions fill the Description field, but can be changed. If a check # is entered in the Check # field, it is appended to the description. |
||||||||||||||
|
Amount |
Enter the total Amount of the receipt. |
||||||||||||||
|
Remaining |
The Remaining is a calculated field. It is the difference between the Amount field in the Receipt Information section, and what is currently applied (offset) to the applicable voucher sections. The receipt cannot be posted until the Remaining field balance is zero. |
Each type of receipt has its own combination of the voucher sections listed below, and each section may appear in one or more receipt types.
Vouchers may be debit or credit amounts as long as their combined totals equal the amount of the receipt entered in the Receipt Information section. The status of the voucher postings are indicated by the Remaining to Apply field in the Receipt Information section.
If you have security authorization for New Receipts and Interdivision Accounting you can post receipts to a bank and invoices in different divisions on the same receipt. For more information see Workflow: Setting Up and Using Interdivision Accounting for Customer, Broker, and Finance Company Cash Receipts.
The Account Current Statement section is available to apply monies received from Insurance, Brokerage or Fee companies.
When you open this section, the grid contains all Ready to Pay account current statements for the company defined in the Name field in the Receipt Information section.
In addition, the account current must match the division assigned to the bank where you are depositing the check.
|
Buttons |
What is this? |
|
Select All |
Checks the Pay checkbox for all account current statements in the grid. |
|
Clear All |
Clears the Pay checkbox for all checked account current statements in the grid. |
|
Display all Statements |
When you check the Display all Statements checkbox, all account current statements for companies matching the banks division and the Received From type appear in the grid list. Received From types are:
Since many companies are merging today, this feature gives you the ability to gather two or more statements for different companies onto one receipt. |
You cannot change any of the fields in the account current grid. If the amount is not correct, you need to go back to the account current, change the Status to In Progress, and reconcile the invoices on the statement to match the amount of the company check.
|
Grid Fields |
What is this? |
|
Division |
This is the division selected when you created the account current. |
|
Date |
This is the Statement Date when you created the account current statement. |
|
Name |
The name of the insurance, brokerage or fee company. |
|
Identifier |
This is the Statement Description when you created the account current statement. |
|
Status |
This is the current status of the Account Current. It will always be Ready to Pay. |
|
Payable Balance |
This is the total debit (negative) unpaid balance of all invoices on the Account Current. |
|
Pay Amount |
This is the total amount to receipt against this account current. It defaults from the Payable Balance and cannot be changed. If you need to change the amount, open the account current and reconcile the invoices to match the check from the company. |
By default, the Insured Accounts Receivable section displays all of the customer's open invoice balances, not equal to zero.
Prior to posting, if an entry is made in error, or needs to be corrected, select the transaction, and click on the Edit link. Correct the entry or to delete, bring the Amount of the entry to zero (0.00). Zero amount voucher lines do not post.
At the time of the cash receipt, a time-saving feature of AMS360 allows you the option to Waive Late Charges and Small Balances.
To find the invoices to pay:
|
Finding Invoices |
What is this? |
|||||||
|
New Receipt Accessed From |
|
|||||||
|
Non-Zero Balance Items Only |
At any time, if you wish to change the invoice selection criteria, choose one of the options below. When using these options to re-select invoices, click on the desired option and click the Get Data button to retrieve the invoices.
|
|||||||
|
All Invoices Since |
||||||||
|
Sort |
The table's default sort is by policy #, and then by invoice #. To help you find the invoices quicker, you can sort, and filter the invoices in the table. For more information, see Tables in Data Entry Forms, in Getting Started. |
Posting the direct bill commission check from your insurance/brokerage company directly to income, assumes you do not invoice your direct bill business and do not require statistical information at the policy level. When the commission check is received, post it directly to income (normally a credit).
Prior to posting, if an entry is made in error, or needs to be corrected, select the transaction, and click the Edit link. Correct the entry or to delete, bring the Amount of the entry to zero (0.00). Zero amount voucher lines do not post.
|
Fields |
What is this? |
|
GL # |
Select the appropriate general ledger number from the table and click Edit, or click New and select from the list in the GL # field. The GL numbers available in this section are:
Use the Other GL Accounts voucher section to post DB Commission Income received from brokerage companies (40122, 40222, 40322 and 40422). |
|
Amount |
Enter the amount of the company's direct bill commission payment to your agency. |
|
GL Department |
Since the accounts in this section are income accounts, you must select a Department. Using the list, select the correct department for this transaction. |
You can apply the receipt by typing directly in the voucher table, or selecting the invoice and clicking Edit.
An option is also available in Agency Setup > Accounting Options to Automatically Apply Receipts to Oldest Invoices. Click here for an example.
|
Fields |
What is this? |
|
Amount |
Enter the amount of money to be applied. |
|
Description |
Enter a description for the transaction. This field pre-fills with default descriptions , based on the Receipt Type selected in the Receipt Information section. This can be changed, if desired. |
|
Waive |
If you wish to waive a late charge or small balance, you must select the voucher, and click Edit. Then, check the Late Charge for this Invoice and/or the Small Balance for this Invoice checkbox, as appropriate. Late Charge for this Invoice
Small Balance for this InvoiceThe amount displayed in the Small Balance for this Invoice field calculates based on the invoice balance, minus the receipt amount and the late charges, if they exist.
|
By default, the Broker's Accounts Receivable section displays all of the broker's open invoice balances, sorted by customer.
Prior to posting, if an entry is made in error, or needs to be corrected, select the transaction, and click on the Edit link. Correct the entry or to delete, bring the Amount of the entry to zero (0.00). Zero amount voucher lines do not post.
At the time of the cash receipt, a time-saving feature of AMS360 allows you the option to Waive Late Charges or Small Balances
To find the invoices to pay:
|
Finding Invoices |
What is this? |
||||||
|
New Receipt Accessed From |
|
||||||
|
Non-Zero Balance Items Only |
At any time, if you wish to change the invoice selection criteria, choose one of the options below. When using these options to re-select invoices, click on the desired option and click the Get Data button to retrieve the invoices.
|
||||||
|
All Invoices Since |
|||||||
|
Sort |
The table's default sort is by customer, by policy #, and then by invoice #. To help you locate the invoices quicker, you can use the sort, and filter capabilities of the table. For more information on sorting and filtering, see Tables in Data Entry Forms, in Getting Started. |
To apply money on account, click the Add on Account link. These monies post to GL account #11221 (Broker Accounts Receivable).
|
Fields |
What is this? |
|
Amount |
Enter the Amount of money to apply on account. |
|
Description |
Enter a Description for the on account transaction. This field pre-fills with default descriptions, based on the Receipt Type selected in the Receipt Information section. This can be changed, if desired. |
|
Customer |
Select the customer by clicking the Search link. This takes you to the Customer Search form where you can make your selection. To apply money at the broker level, leave the Customer field blank. If a customer is selected in error, select it and press Delete on your keyboard. |
|
Policy |
To apply money to a broker's customer at the policy level, select a policy from the list. Only policies belonging to the customer selected above, appear in this list. To apply money at the broker's customer account level, leave the Policy field blank. If a policy is selected in error, select it and press Delete on your keyboard. |
You can apply the receipt by typing directly in the voucher table, or selecting the invoice and clicking Edit.
An option is also available in Agency Setup > Accounting Options to Automatically Apply Receipts to Oldest Invoices. Click here for an example.
|
Fields |
What is this? |
|
Amount |
Enter the voucher amount for this part of the receipt. |
|
Description |
Enter a description for the transaction. This field pre-fills with default descriptions, based on the Receipt Type selected in the Receipt Information section. This can be changed, if desired. |
|
Waive |
If you wish to waive a late charge or small balance, you must select the voucher, and click Edit. Then, check the Late Charge for this Invoice and/or the Small Balance for this Invoice checkbox, as appropriate. Late Charge for this Invoice
Small Balance for this InvoiceThe amount displayed in the Small Balance for this Invoice field calculates based on the invoice balance, minus the receipt amount and the late charges, if they exist.
|
By default, the Finance Accounts Receivable section displays all of the finance company's open invoice balances, sorted by customer.
Prior to posting, if an entry is made in error, or needs to be corrected, select the transaction, and click on the Edit link. Correct the entry or to delete, bring the Amount of the entry to zero (0.00). Zero amount voucher lines do not post.
At the time of the cash receipt, a time-saving feature of AMS360 allows you the option to Waive Late Charges and Small Balances.
To find invoices to pay:
|
Finding Invoices |
What is this? |
||||||
|
New Receipt Accessed From |
By default, if receipts are accessed through the Company Center:
|
||||||
|
Non-Zero Balance Items Only |
At any time, if you wish to change the invoice selection criteria, choose one of the options below. When using these options to re-selectinvoices, click on the desired option and click theGet Databutton to retrieve the invoices.
|
||||||
|
All Invoices Since |
|||||||
|
Sort |
The table's default sort is by customer, by policy #, and then by invoice #. To help you find the invoices quicker, you can sort, and filter the invoices in the table. For more information, see Tables in Data Entry Forms, in Getting Started. |
To apply money on account, click the Add on Account link. All monies post to GL account #11231 (Finance Company Receivables).
|
Fields |
What is this? |
|
Amount |
Enter the amount of money to apply on account. |
|
Description |
Enter a description for the on account transaction. This field pre-fills with default descriptions, based on the Receipt Type selected in the Receipt Information section. This can be changed, if desired. |
|
Customer |
Select the customer by clicking the Search link. This takes you to the Customer Search form where you can make your selection. If a customer is selected in error, select it and click the Deletekey on your keyboard. |
|
Policy |
To apply money to a customer at the policy level, select a policy from the list. Only policies belonging to the customer selected above, appear in this list. To apply money at the customer account level, leave the Policy field blank. If a policy is selected in error, click theDeletekey on your keyboard. |
You can apply the receipt by typing directly in the voucher table, or selecting the invoice and clicking Edit.
|
Fields |
What is this? |
|
Normal |
Enter the voucher amount for this part of the receipt. |
|
Description |
Enter a description for the transaction. This field pre-fills with default descriptions , based on the Receipt Type selected in the Receipt Information section. This can be changed, if desired. |
|
Waive |
If you wish to waive a late charge or small balance, you must select the voucher, and click Edit. Then, check the Late Charge for this Invoice and/or the Small Balance for this Invoice checkbox, as appropriate. Late Charge for this Invoice
Small Balance for this InvoiceThe amount displayed in the Small Balance for this Invoicefield calculates based on the invoice balance, minus the receipt amount and the late charges, if they exist.
|
Use the Direct Bill Deposit section, to enter receipts from brokers, broker customers, insureds, finance, insurance or brokerage companies, and employees for monies received for a direct bill policy or application.
These monies are posted to general ledger account #21121-DB Deposits Payable Ins. Co, #21122-DB Deposits Payable Brokerage Co, or 21125-DB Deposits Payable Finance Companies and then are paid out to the company using the Direct Bill Deposit section of the check form.
Example A broker, broker's customer, or insured should pay the insurance, or finance company directly, for the direct bill policy premium. Instead, they send the money to your agency. You need to hold these funds in trust until payment is made to the appropriate party.
|
Fields |
What is this? |
|
Customer |
This field appears only when entering a receipt from a:
This enables you to split the payment between one or more insureds. Select the appropriate customer by clicking the Search link. This takes you to the Customer Search form. Find the customer and click the Select button. |
|
Amount |
Enter the Amount of the Direct Bill Deposit. |
|
Description |
Depending on the type of payment (cash, check, etc) there is a default description. This can be changed. |
|
Insurance Co |
If the funds should be held in trust for an Insurance Company, select the appropriate company from the list. Only one insurance/brokerage or finance company can be selected. |
|
Finance Co |
If the funds should be held in trust for a Finance Company, select the appropriate company from the list. Only one insurance/brokerage or finance company can be selected. |
|
Brokerage Co |
If the funds should be held in trust for a Brokerage Company select the appropriate company from the list. Only one insurance/brokerage or finance company can be selected. |
When posting a receipt for a customer to the Direct Bill Deposit section of the Receipts form you receive the following message:
Click Yes to open the Direct Bill Deposit Check form for the company selected in the receipt.
Click No on this message if you do not wish to immediately create the check to the company for this receipt. See Checks for information about issuing a check outside of the Receipt workflow.
The amount of the receipt defaults into the General Information and the voucher section of the check.
Post and Print the check, as normal.
Whether you bill your direct bill business by invoicing it or posting it through the direct bill statement, AMS360 posts the commission due your agency (normally a debit), to general ledger account #11241 (DB Comm Receivable - Insurance Companies) or 11242 (DB Comm Receivable - Brokerage Companies).
Subsequently, you need to post the commission check (receipt) from the insurance company to account #11241, or #11242 (normally a credit) via the Direct Bill Commission Receivables section of the receipt.
Prior to posting, if an entry is made in error, or needs to be corrected, select the transaction, and click on the Edit link. Correct the entry or to delete, bring the Amount of the entry to zero (0.00). Zero amount voucher lines do not post.
|
Fields |
What is this? |
|
Amount |
Enter the amount of the company's direct bill commission payment to your agency. |
Posting the direct bill commission check from your insurance/brokerage company directly to income, assumes you do not invoice your direct bill business and do not require statistical information at the policy level. When the commission check is received, post it directly to income (normally a credit).
Prior to posting, if an entry is made in error, or needs to be corrected, select the transaction, and click on the Edit link. Correct the entry or to delete, bring the Amount of the entry to zero (0.00). Zero amount voucher lines do not post.
|
Fields |
What is this? |
|
GL # |
Select the appropriate general ledger number from the table and click Edit, or click New and select from the list in the GL # field. The GL numbers available in this section are:
Use the Other GL Accounts voucher section to post DB Commission Income received from brokerage companies (40122, 40222, 40322 and 40422). |
|
Amount |
Enter the amount of the company's direct bill commission payment to your agency. |
|
GL Department |
Since the accounts in this section are income accounts, you must select a Department. Using the list, select the correct department for this transaction. |
Use this section to receipt any payments received that you want to use to reduce administrative salary expenses. To access the Administrative Salaries section:
Select the payee (employee) of the receipt from the Employee Center.
Select New Receipt from the Actions menu.
Open the Administrative Salaries section.
|
Fields |
What is this? |
|
GL# |
Select the appropriate general ledger number from the table and click Edit, or click New and select from the list in the GL # field. The default GL numbers available in this section are:
The system defaults any general ledger account numbered between 61000 and 62000 into this grid. If you need additional accounts to default for data entry, be sure they are added in Chart of Accounts Setup between this number range. |
|
Amount |
Enter the amount of the payment to your agency. |
|
Description |
The default description for this receipt is "Adjusting JE". This can be changed if desired. |
|
Department |
Since the accounts in this section are expense accounts, you must select a Department. Using the list, select the correct department for this transaction. |
Use the Employee Expenses and Reimbursements section to record an expense or reimbursement transaction for an employee, to general ledger account #21160. This account is subledgered by employee.
Example Let's say you are receipting a reimbursement check from your telephone company, and a portion of it belongs to your employee.
The portion of the reimbursement belonging to the agency is posted directly to the telephone expense account as a credit. The employee's portion of the reimbursement is posted as a credit to account #21160 - Employee Expenses and Reimbursements.
Then, when the reimbursement is paid to the employee, account #21160 is debited, clearing this transaction.
|
Fields |
What is this? |
|
Amount |
This is the Amount of money you wish to charge or reimburse your employee. |
|
Description |
This is the Description of the charge or reimbursement to your employee. "Adjusting JE" defaults but can be changed. |
|
1099 |
If this is a 1099 charge or reimbursement, select the appropriate 1099 Category and Type. Questions should be directed to your agency accountant. If the employee is setup with a 1099 default, this information automatically pulls to the Employee Expenses and Reimbursements, 1099 section. |
The Other GL Accounts section is available to apply monies received to other general ledger accounts, which are not available through the other receipt sections.
|
Fields |
What is this? |
|||||
|
GL # |
Select the GL # you wish to apply the money to. |
|||||
|
Amount |
Enter the Amount to apply. This field defaults to the amount Remaining to Apply found in the Receipt Information section. This can be changed. |
|||||
|
Description |
Enter a Description for the transaction. A default description pulls to the field, based on the Receipt Type in the Receipt Information section. This can be changed. |
|||||
|
Division |
Division assigned to the selected bank. This cannot be changed. |
|||||
|
GL Department |
Choose the appropriate GL Department for your transaction.
|
|||||
|
1099 |
If this is a 1099 expense reimbursement, select the appropriate 1099 Category and Type. If this is not a 1099 reimbursement transaction, delete the Category and Type information, if necessary. Questions as to whether this is a qualified 1099 expense should be directed to your agency accountant.
|
|||||
|
GL # Required Fields |
The GL # Required Fields drop-down lists are subledger entities (customer, broker, insurance company brokerage company, etc.). Depending upon the GL # selected, the account may require a subledger entity be chosen. If the account is subledgered, its subledger entity is active. |
When you post a receipt, the Receipt Amount posts as a debit (increase) to the GL #11170 Bank Holding account. Then, when the receipt is included on a Bank Deposit and posted, GL account #11170 is credited (decrease) and the appropriate GL bank account is debited (increase).
To Post, or Cancel a receipt, click the File menu and make your selection or click the appropriate icon.
|
Posting Type |
Icon |
What Happens |
|
Post and New |
|
Posts the current receipt and then displays a blank Receipt form to facilitate entering another receipt. This option is only available when entering receipts in the Bank Center. |
|
Post |
|
Posts to the general ledger and closes the Receipt form. |
|
Post and Print |
|
Posts the receipt and prints the receipt for the customer. This option is only available when Received From = Insured. |
|
Cancel |
|
Cancels the check action, and returns you to your point of origin. |
Do you have all of your receipts posted for the day? See Bank Deposit for information on gathering receipts into a deposit for the bank.
Can't find what you're looking for? Log on to My Vertafore for more resources.
|
My Vertafore Support | Vertafore University | NetVU Network | Vertafore.com © 2015 Vertafore, Inc. and its subsidiaries. All Rights Reserved. Vertafore, the Vertafore design, AMS360, Vertafore Producer Advantage, Producer Plus, AgencyEDGE, ReferenceConnect, BenefitPoint, Engage, and WorkSmart are registered trademarks of Vertafore, Inc. or its subsidiaries. Third party marks belong to their respective holders. AMS360 Classic Help updated 5/18/2016 10:58 PM |