
Working with Accounts
If you work mostly with other organizations, you’ll probably want to use accounts to keep track of them.
You can use accounts to keep track of the organizations you do business with. You can access Accounts a few ways.
- From the top navigation bar - On the top navigation bar click Sales and select the Accounts tile. A list of all accounts appears.

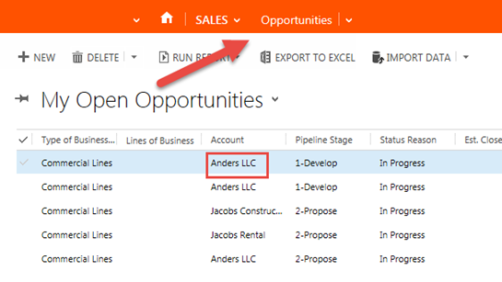
- From within a Opportunity – On the top navigation bar click Sales and then select the Opportunities tile. A list of all opportunities appears, now click on the Account name.
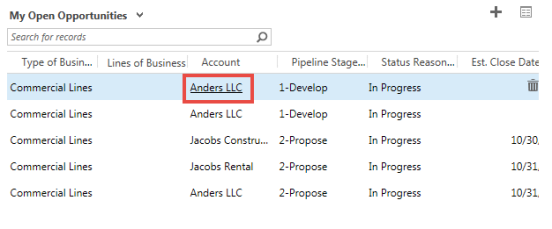
- From the My Open Opportunities section on the dashboard, click on the Account name.
- On the navigation bar, click on the Vertafore logo and then select the Sales tile. The Sales work area appears on the navigation bar and the sales dashboard appears.
- On the top navigation bar, click on Sales again and then select Accounts. A list of all active accounts appears.

|
It’s easy to get back to the customer data you were working with most recently. On the navigation bar, next to Accounts, click the down arrow. Choose a name, and then get right back to what you were doing. |
- Click on an account name to see the details of the account.
- On the top navigation bar, click on the Vertafore logo and click on the Sales tile. The Sales work area appears on the navigation bar and the sales dashboard appears.
- On the top navigation bar click on Sales and then select Accounts. A list of all you active accounts appears.
- On the top command bar click New. The new account page appears.
- Complete the Summary and Details section. See below for detailed fields within these sections.
- Click Save & Close.
The account page provides a complete snapshot of the organization. The account details page includes three main sections the Summary and Details.
The Summary section includes:
- Account Information
- Type of Business
- Activities and Notes
- Primary Contact
- Contacts
- Open Opportunities
Details
- Company Profile
- Marketing
- Child Accounts
- Domain Settings
- Contact Preferences
- Current Policy Information
- Connections
- Policies
AMS360 Details
The AMS360 Details link is available if you are synced with AMS360. Click on the link to expand of collapse the section. If you are not synched with AMS360, an error will appear. At the account level, this section displays all policy information related to the account. At the Account level, AMS360 Details displays seven tabs - Suspense, Activities, Submissions, Policies, Documents, Claims and Notes. Each tab has AMS360 entity filters to narrow down the view.
- Filter Criteria - Use the AMS360 entity filters to narrow down the view. The filters vary based on the selected tab.
- Suspense - From this, a producer can view all the Suspenses and their full description in SalesTrack. A producer can create and assign a Suspense for a CSR in AMS360.
- Activities - Lists all closed Activities in SalesTrack and all future dated activities created by the CSR in AMS360.
- Submissions – Lists all Submissions for the account by Company, Transaction Effective Date and Submission #.
- Policies – Lists all Policies for the account by Policy #, Effective and Expiration Dates, Company and includes a description. Click on the policy to view the dec page. Policy summary views are available for Homeowners, Private Passenger Auto, Commercial Property, Business Auto, General Liability, Workers Compensation, Commercial Umbrella and Package policies includes BOP and any policy with multiple lines of business. A combined summary displays for all lines of business that have a Summary view and for other lines of business on the policy, without a Summary, the line of business name displays with a message that detail is not currently available.
- Documents - Lists all Documents a CSR has added to the submission in AMS360. Use the File Extension filter to view documents by type.
- Claims – Lists all Claims made for the account by Loss date, Claim #, Policy # etc.
- Notes - This tab list all notes a Producer has added in SalesTrack and a CSR has added to the Customer (includes submissions or policies) in AMS360. Use the filter to view a Sticky.
- On the top navigation bar, click on the Vertafore logo and click on the Sales tile. The Sales work area appears on the navigation bar and the sales dashboard appears.
- On the top navigation bar click on Sales and then select Accounts. A list of all you active accounts appears.
- Select the account and on the command bar click Edit. The Account information appears. Or,
- Click on the Account name. The account information appears.
- Make your edits and click Save & Close.
If an account has any activity, we suggest you deactivate an account and not delete it.
- On the top navigation bar, click on the Vertafore logo and click on the Sales tile. The Sales work area appears on the navigation bar and the sales dashboard appears.
- On the top navigation bar click on Sales and then select Accounts. A list of all you active accounts appears.
- Click on the Account name. The account information appears.
- On the command bar click Delete. The confirmation message appears with an option to Delete or Deactivate.
- Click Delete.
In SalesTrack, you deactivate an account rather than deleting it. This ensures the integrity of the audit trail associated with that record.
Deactivating an account means that it cannot be edited or used in establishing new relationships with other records. However, all relationships created with the deactivated item are still available.
Deactivated accounts can be reactivated if required.
- On the top navigation bar, click on the Vertafore logo and click on the Sales tile. The Sales work area appears on the navigation bar and the sales dashboard appears.
- On the top navigation bar click on Sales and then select Accounts. A list of all you active accounts appears.
- Click on the Account name. The account information appears.
- On the command bar click Deactivate. The confirmation message appears.
- Click Deactivate.
- On the top navigation bar, click on the Vertafore logo and click on the Sales tile. The Sales work area appears on the navigation bar and the sales dashboard appears.
- On the top navigation bar click on Sales and then select Accounts. A list of all your active accounts appears.
- To view a deactivated account, click on My Active Accounts drop-down in the dashboard and select Inactive Accounts.
You can assign one or multiple accounts to another user or team within SalesTrack. You can assign a single account from the My Active Accounts list page or from within the account itself.
- On the top navigation bar, click on the Vertafore logo and click on the Sales tile. The Sales work area appears on the navigation bar and the sales dashboard appears.
- On the top navigation bar click on Sales and then select Accounts. A list of all you active accounts appears.
- To assign multiple accounts, select the accounts, and on the command bar click the ... More Commands button and then select Assign.
- To assign a single account, select or open the account, and on the command bar click Assign.
- The Assign Account page appears. Select Assign to another user or team.
- From the inline search field, find the user and click Assign.
You can share one or multiple accounts to another user or team within SalesTrack. You can share a single account from the My Active Accounts list page or from within the account itself.
- On the top navigation bar, click on the Vertafore logo and click on the Sales tile. The Sales work area appears on the navigation bar and the sales dashboard appears.
- On the top navigation bar click on Sales and then select Accounts. A list of all you active accounts appears.
- To share multiple accounts, select the accounts, and on the command bar click Share. The Share account page appears.
- To share a single account, select or open the account, and on the command bar click Share. The Share account page appears.
- From the Common Tasks side bar, select Add User/Team. The Look Up Records page appears.
- Using the Look for, Look in or Search field, find the user.
- Click on the user name and then click Select.
- To share with multiple users, find those users and select them.
- When you are done adding all users, click Add.
© 2017 Vertafore