
Configure Email
Before your agency goes live, an Agency Admin makes a decision whether to setup email with:
When an agency uses server side synchronization only, a SalesTrack user can:
- Send email or create new meeting or task from within SalesTrack. This activity is tracked by Outlook automatically.
- Once the email activity is synced with Outlook, the user can use Outlook to continue the communication without remaining in SalesTrack. This communication is automatically synced with SalesTrack.
- SalesTrack user does not require Outlook to be open to access the emails. It can be accessed from anywhere using phones/tablets.
While there are benefits, some points to consider:
- Email/Task/Meeting activity created in Outlook does not get synced back to SalesTrack.
- Email Server profile and each user’s mailbox setup is required. For more information see Set up Server Side Synchronization below.
When an agency uses Outlook Plugin only, some advantages include:
- No email server profile and mailbox setup required.
- Email/Task/Meeting activity created in Outlook is synced back to SalesTrack.
- Email/Task/Meeting activity created in SalesTrack is synced only when Outlook is opened.
While there are benefits, some issues to consider include:
- Outlook need to remain open sync the emails. This can be a disadvantage when a user wants to view new email and accesses the same using a phone/tablet and there is none, since the Outlook is not opened on the user’s side for the sync to happen.
- Outlook client need to be installed and configured for each user. For more information see Set up Server Side Synchronization section below.
For instructions on Outlook CRM Plug-in only see Step 1: Install the Outlook CRM Plug-in for your SalesTrack
When an agency chooses to use both server side synchronization and the Outlook Plugin, some benefits include:
- A user can create a new Meeting or Task and send Email from within SalesTrack. This is tracked by Outlook automatically.
- Once the email activity is synced with Outlook, the user can use Outlook to continue the communication forward without remaining in SalesTrack. This is automatically synced with SalesTrack.
- Email/Task/Meeting activity created in outlook gets synced in SalesTrack (user click on Track in CRM button in Outlook to initiate the sync.)
- Do not need outlook client to be opened to access the emails. It can be accessed from anywhere using a phone or tablet.
While there are benefits, some issues to consider include:
- Email Server profile and each user’s mailbox setup is required. For more information see the Set up Server Side Synchronization below.
- Outlook client need to be installed and configured for each user. For more information see the section on Set up Outlook Plug-in.
Set up Server Side Synchronization
In SalesTrack, when new users configure email, by default all their contacts will synchronize between SalesTrack and list of Contacts in their mailbox. This is the default configuration and it is recommended by Vertafore. If your agency prefers to change this default behavior to not synchronize the contacts, please create a case in My Vertafore to run a script.
Remember, when email is accessed from a mobile device, all the contacts that synced over from SalesTrack to the mailbox, may sync to the mobile devices as well.

|
If you want contacts to sync to mailbox but not to the mobile devices, change the mobile device Contacts setting to ensure the sync is turned off. Contact your mobile device manufacturer for further assistance. |
This is a onetime process that has to be done by an agency admin once for the entire agency. This is the setting where we set the exchange information used by the agency to track emails and appointments.
Agency Admin logs on to SalesTrack.
- On the top navigation bar, click on the Vertafore logo name and select Settings.
- On the top navigation bar click Settings and select Email Configuration.

- Select Email Server Profiles. The Active Email Server Profiles page appears.
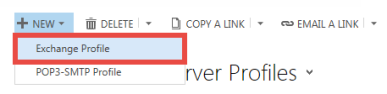
- On the command bar click + NEW and select Exchange Profile. The New Email Server Profile page appears.
- In the General section, provide the Name of the profile. Example: Bothell Exchange.
- Set Auto Discover Server Location to No. Two fields will appear below.
- For the Incoming Server Location and Outgoing Server Location replace the <Server> with the exchange server name of your agency.
- Office 365 users enter the URL as https://outlook.office365.com/EWS/Exchange.asmx.
Click on image below to expand view.
- Office 365 users enter the URL as https://outlook.office365.com/EWS/Exchange.asmx.
- Click the Save button in the command bar above.

- On the side bar under the Common section, click on Mailboxes. The email server profile exchange page appears.
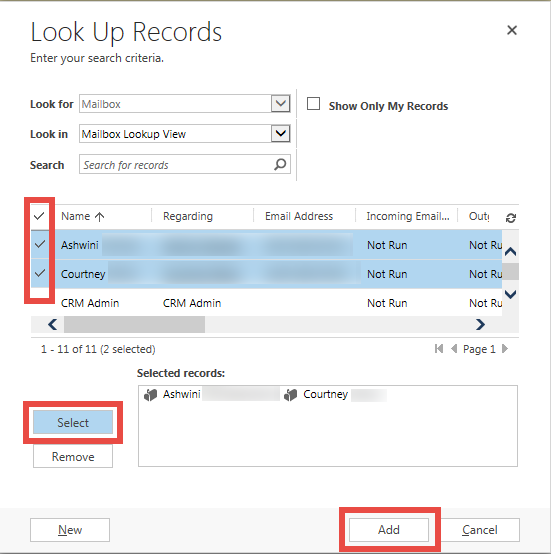
- On the top navigation bar click Add Existing Mailbox. The look up record page appears.
- Using the Search field find the user to be added in the profile. Once the user is found, select the record by clicking the check box next to the name and click Select.
- This will add the selected user in the list of records to be added to the profile (in case we have to add multiple users at a time). Click Add.
Click on image below to expand view.
If this step is performed by the Agency Admin for each user who needs email integration with SalesTrack.
- On the top navigation bar click on the Vertafore logo name click Settings.
- On the top navigation bar click Settings and then select Security.
- Now select Users. A list of all enabled users appears.
- Select the user you want to configure the mailbox. The command bar appears.
- On the command bar click Open Mailbox. The user’s mailbox appears.
-
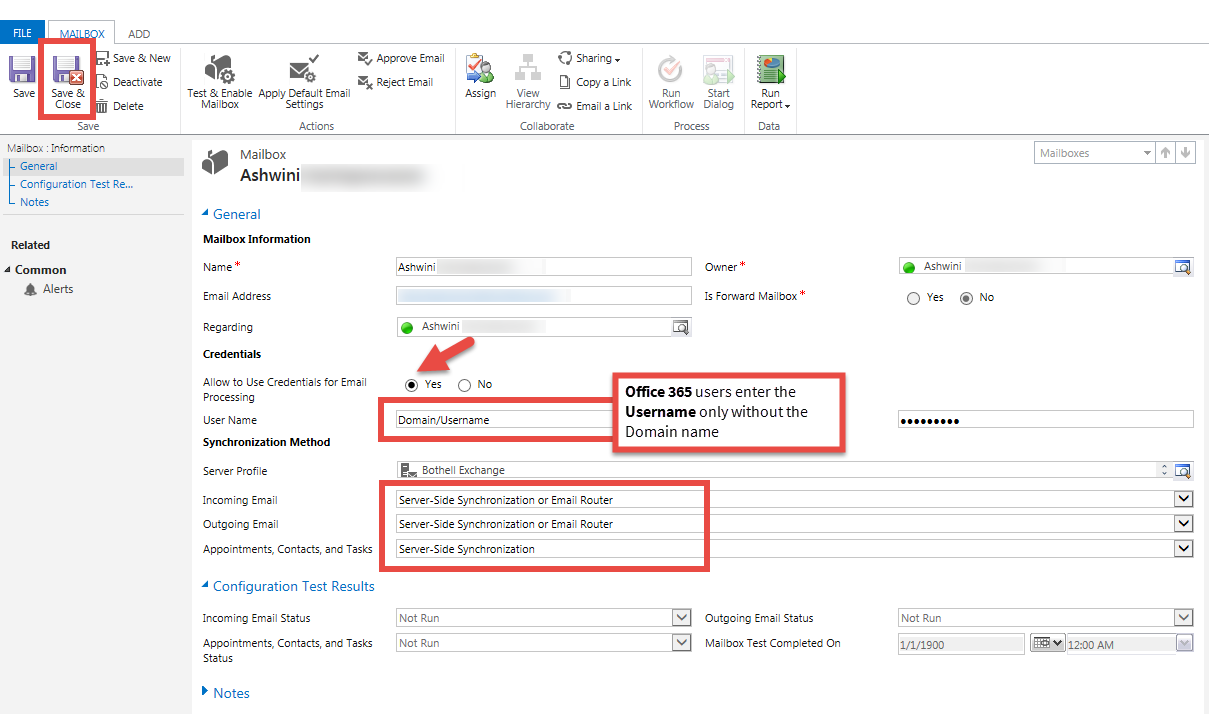
Complete the following fields:
- Verify the Email Address. Click Yes.
- User Name should be your exchange username of the format DOMAINNAME\Username.
- If you are on Office 365 enter just your Username without the Domain name.
- If you are on Office 365 enter just your Username without the Domain name.
- Password should be your Exchange password
- Incoming Email should be set to Server-Side Synchronization or Email Router.
- Outgoing Email should be set to Server-Side Synchronization or Email Router.
- Appointments, Contacts and Tasks should be set to Server-Side Synchronization.
Click on image below to expand view.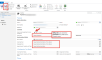
-
Click Save & Close to save the changes.
If this configuration is completed the by the user follow the instructions below:
- Click the Setting icon on the top right of the page and select Options. The set personal options page appears.
- Click the Email tab.
- Click the View your Mailbox link. The user’s mailbox appears.
- Complete the following fields:
- Verify the Email Address. Click Yes.
- User Name should be your exchange username of the format DOMAINNAME\Username.
- If you are on Office 365 enter just your Username without the Domain name.
- Password should be your Exchange password
- Incoming Email should be set to Server-Side Synchronization or Email Router.
- Outgoing Email should be set to Server-Side Synchronization or Email Router.
- Appointments, Contacts and Tasks should be set to Server-Side Synchronization.
-
Click Save & Close to save the changes.
An Agency Admin approves the user’s email address after the user/producer has completed Step 3 above.
- On the top navigation bar click on the Vertafore logo and select Settings.
- On the top navigation bar click Settings and then select Email Configuration.
- Select Email Server Profiles. The active email server profiles page appears.
- Open the server profile created. The email server profile exchange appears.
- On the left side bar click Mailboxes. A list of mailbox associated view appears.
- Click on the user name whose email address needs to be verified. The user’s mailbox appears.
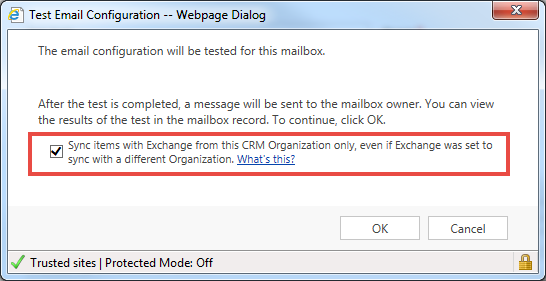
- On the top navigation bar click Approve Email. A confirmation page appears.
- Check mark to select Sync items with Exchange from this CRM Organization only, even if Exchange was set to sync with a different organization.
- Click OK.
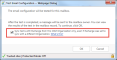
- On the top navigation bar click Test & Enable Mailbox button to verify the changes. A confirmation message appears.
Click on the image below to expand view.
- Click OK. This will run the test and the producer should receive a test email in their Outlook.

© 2017 Vertafore