
Add a Dashboard to View Tasks for Specific Groups
In the steps that follow, we show you how to view tasks for specific groups and how to save that list as a new dashboard favorite. You can modify our example as needed to meet your needs. It is important to note that dashboards that you create are visible and usable by others with the same permissions; bear this in mind when naming your dashboards.
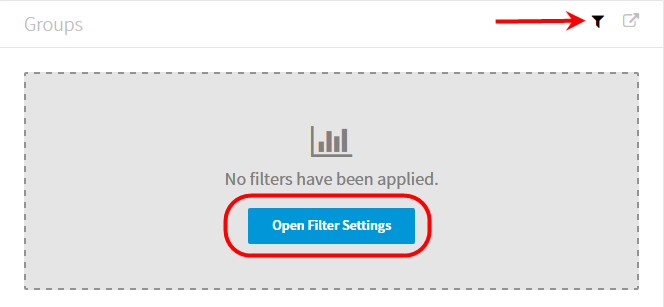
- If you are creating a dashboard for the first time, click Open Filter Settings in the Groups panel.
If you are editing an existing dashboard, click to view the group filter settings.
- In Group Filter Settings,click Select All to select all groups, users, drawers, and file types, or click it again to clear the selection. The list below describes the possible states of the check box.
 – All workflows, steps, groups, users, drawers, and file types are selected.
 – Some of the steps, groups, users, drawers, and file types are selected.
 – No options have been selected.
These options are available when selecting workflows and steps, groups and users, and drawers and file types.

|
You must make at least one selection from each list to create a filter. That is, you must select at least one option from Workflows & Steps, Groups & Users, and Drawers & File Types. |
- Click
 next to Workflow & Steps to expand your list of workflows and steps.
 - Click next to the desired workflow to view the steps within that workflow.
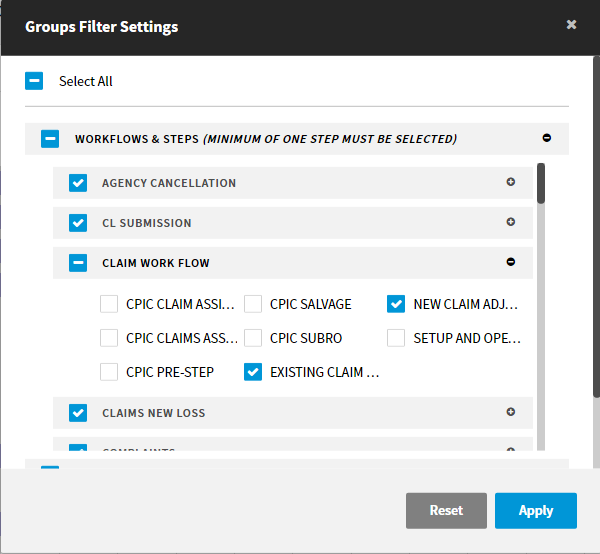
- Click Workflows & Steps to collapse the list of workflows and steps.
- Click Groups & Users to view the list of groups and users.
- Click
 next to a group to view the users within that group.
|
|
ImageRight/WorkSmart supports groups within groups. If your organization utilizes this feature, you may see a group listed with the users in the group you are viewing. This group can be expanded for the selection of users. |
- Select the users or subgroups that you want to view in your dashboard.
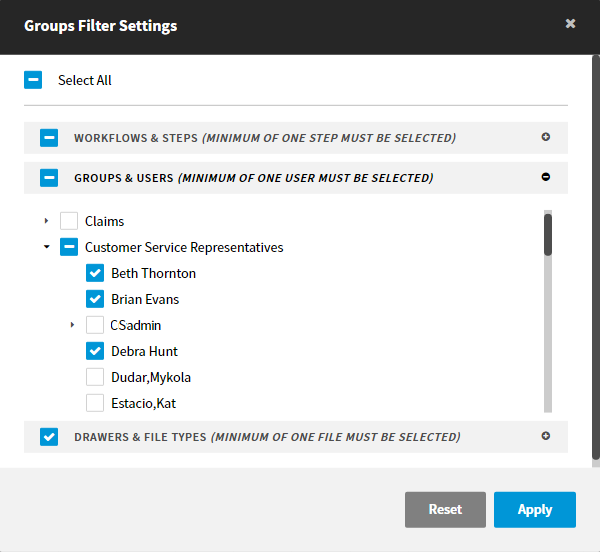
- Click Groups & Users to collapse the list of groups and users.
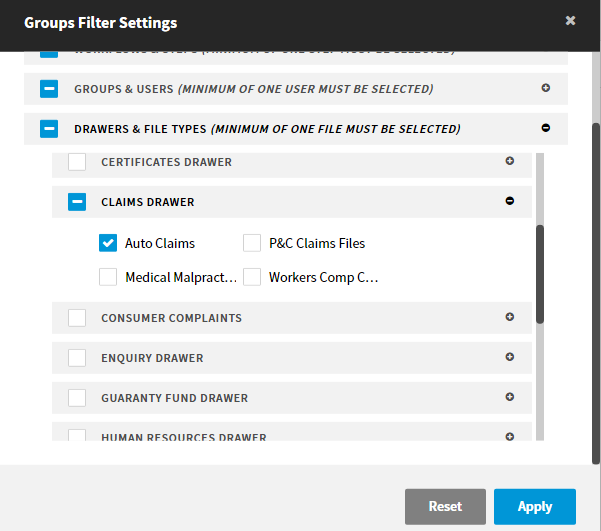
- Click Drawers & File Types.
- Select the drawers that you want to include in your dashboard.
- Click
 to view the file types associated with the drawer.
 - Select the appropriate file types.
- Click Apply to save your changes.
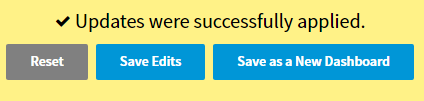
- When prompted, click Save as a New Dashboard to save this view as a new dashboard favorite. Alternatively, you can click Save Edits to save changes to the currently selected dashboard or click Reset to cancel your changes.
- If you are saving a new dashboard, enter the name of the dashboard, and then click Save.
- Select Default View to save the dashboard as your default dashboard.
© 2017 Vertafore